Prerequisites: Before you begin, create an account and complete onboarding. (~15 seconds)
Getting started
After you complete the onboarding process, your screen will look exactly like this.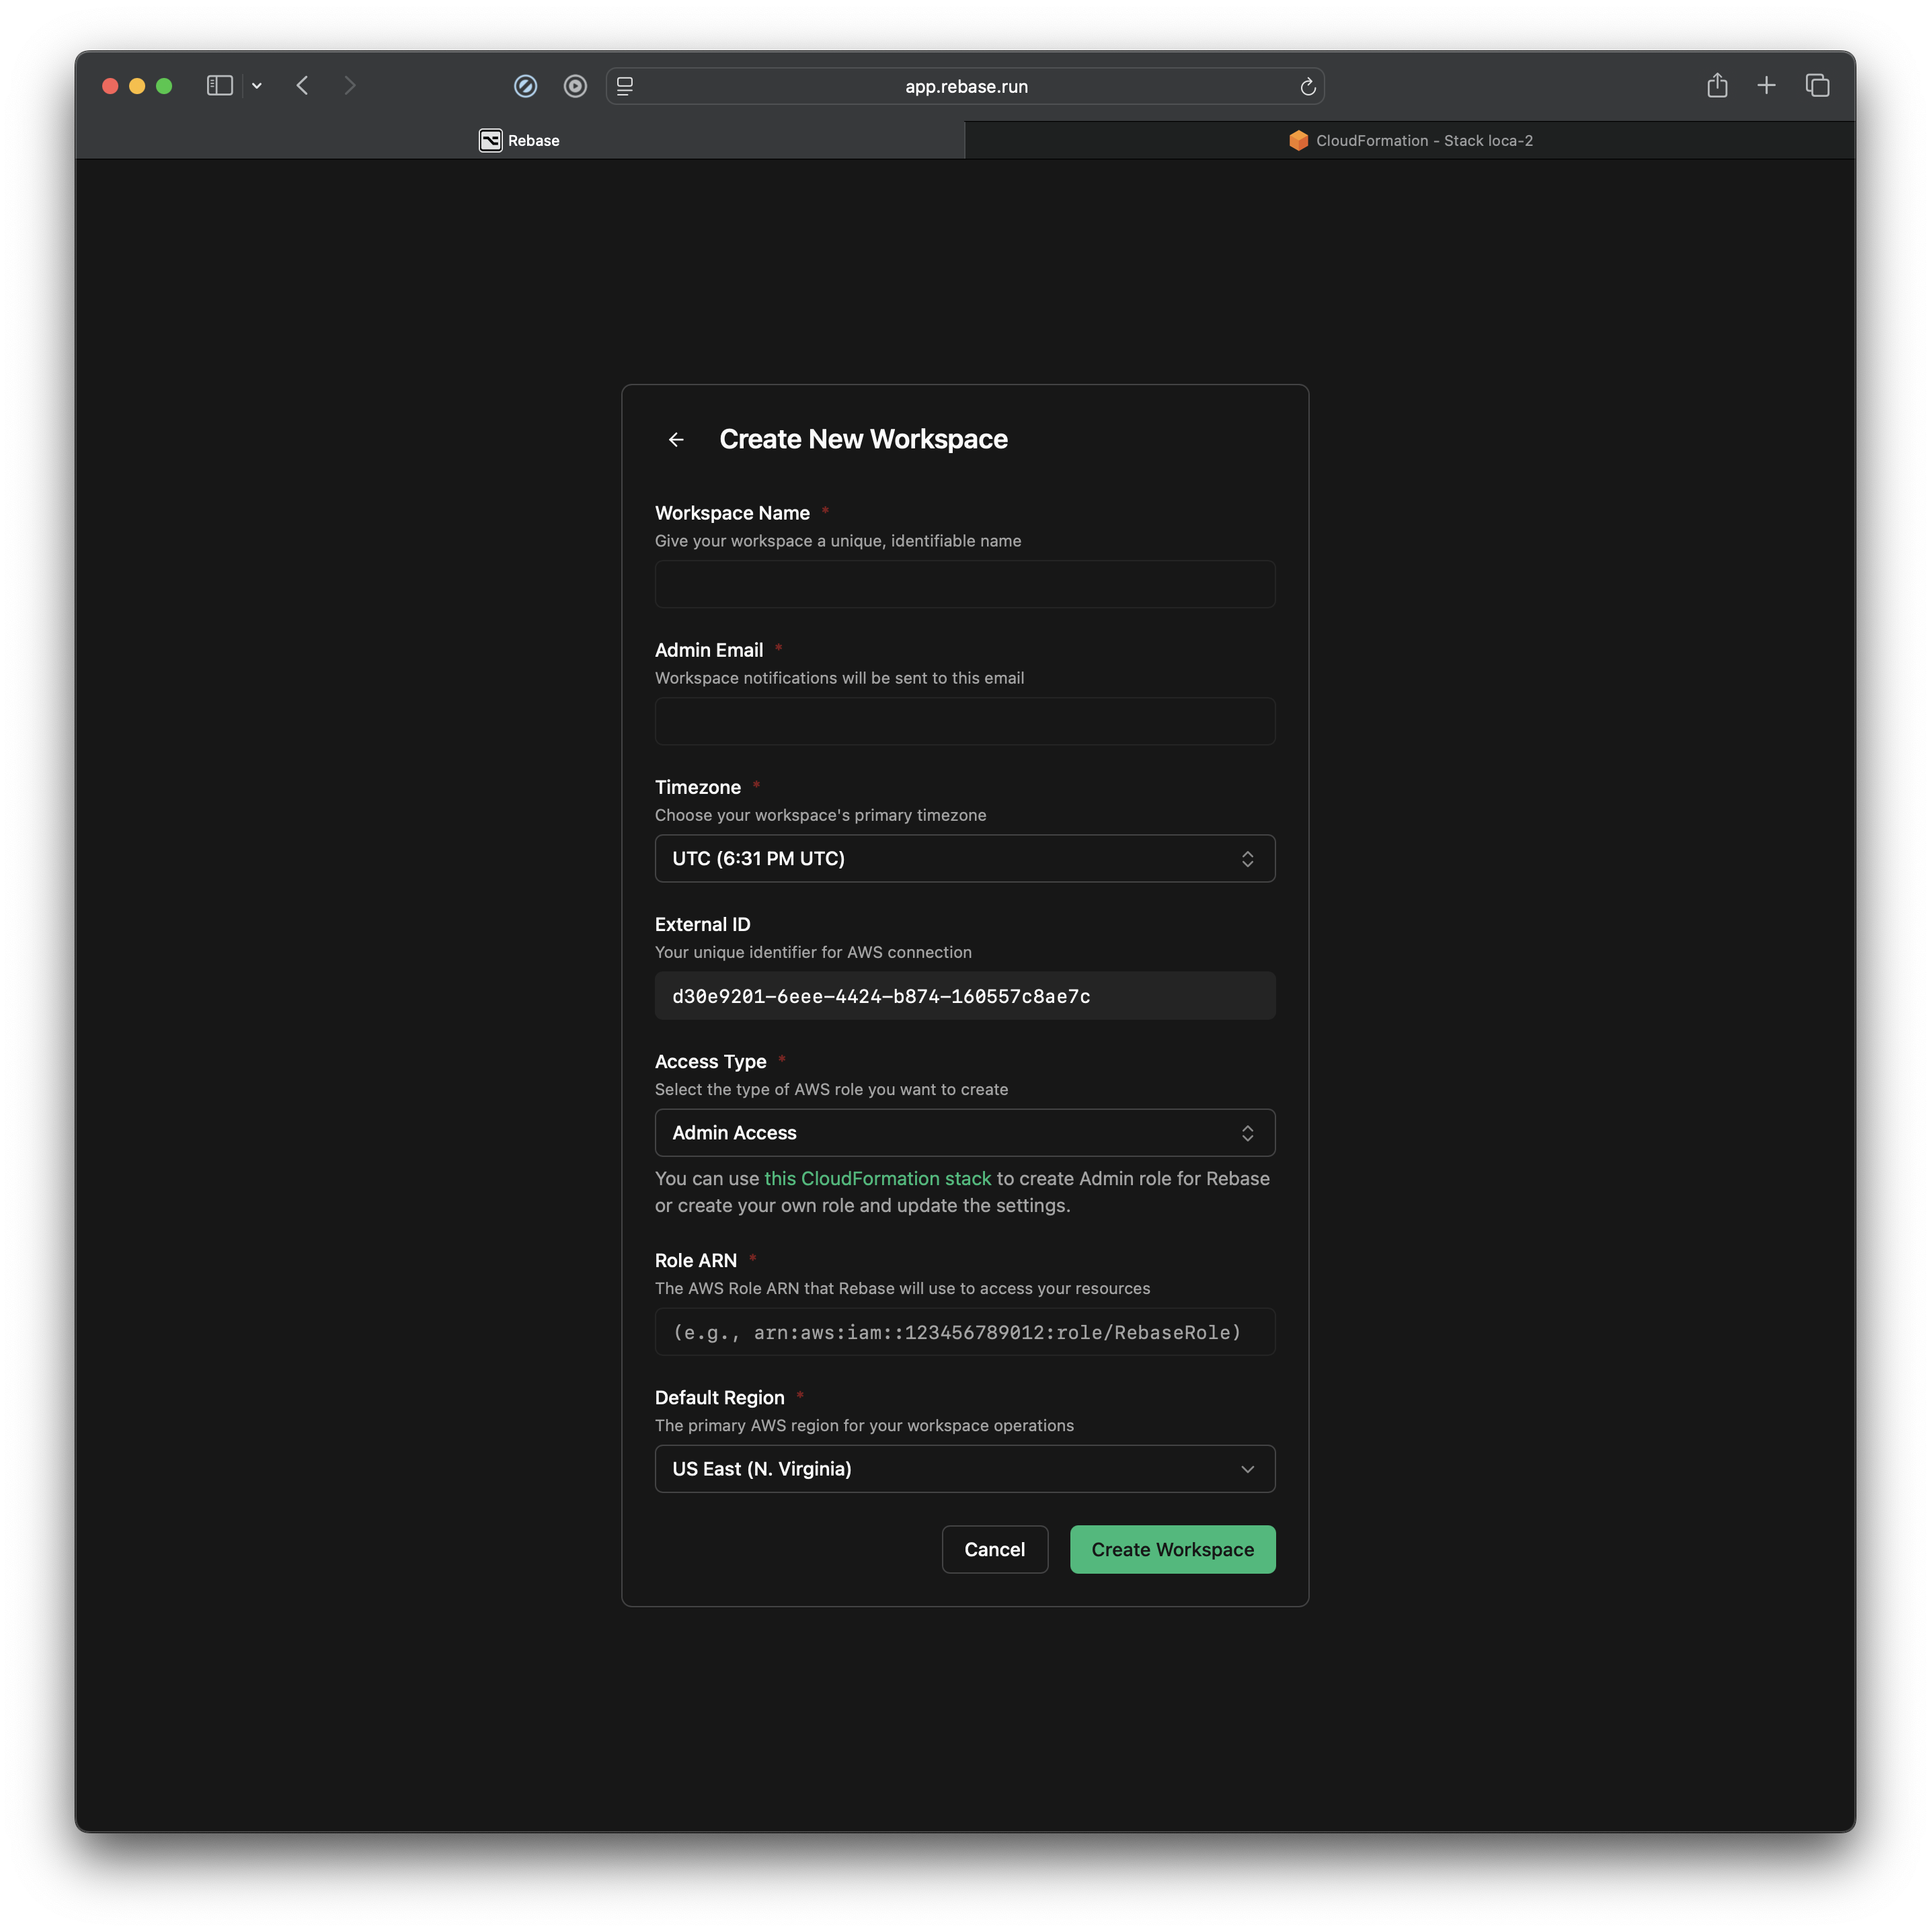 This is where we will connect your AWS account with Rebase.
Heres a quick break down of the field:
This is where we will connect your AWS account with Rebase.
Heres a quick break down of the field:
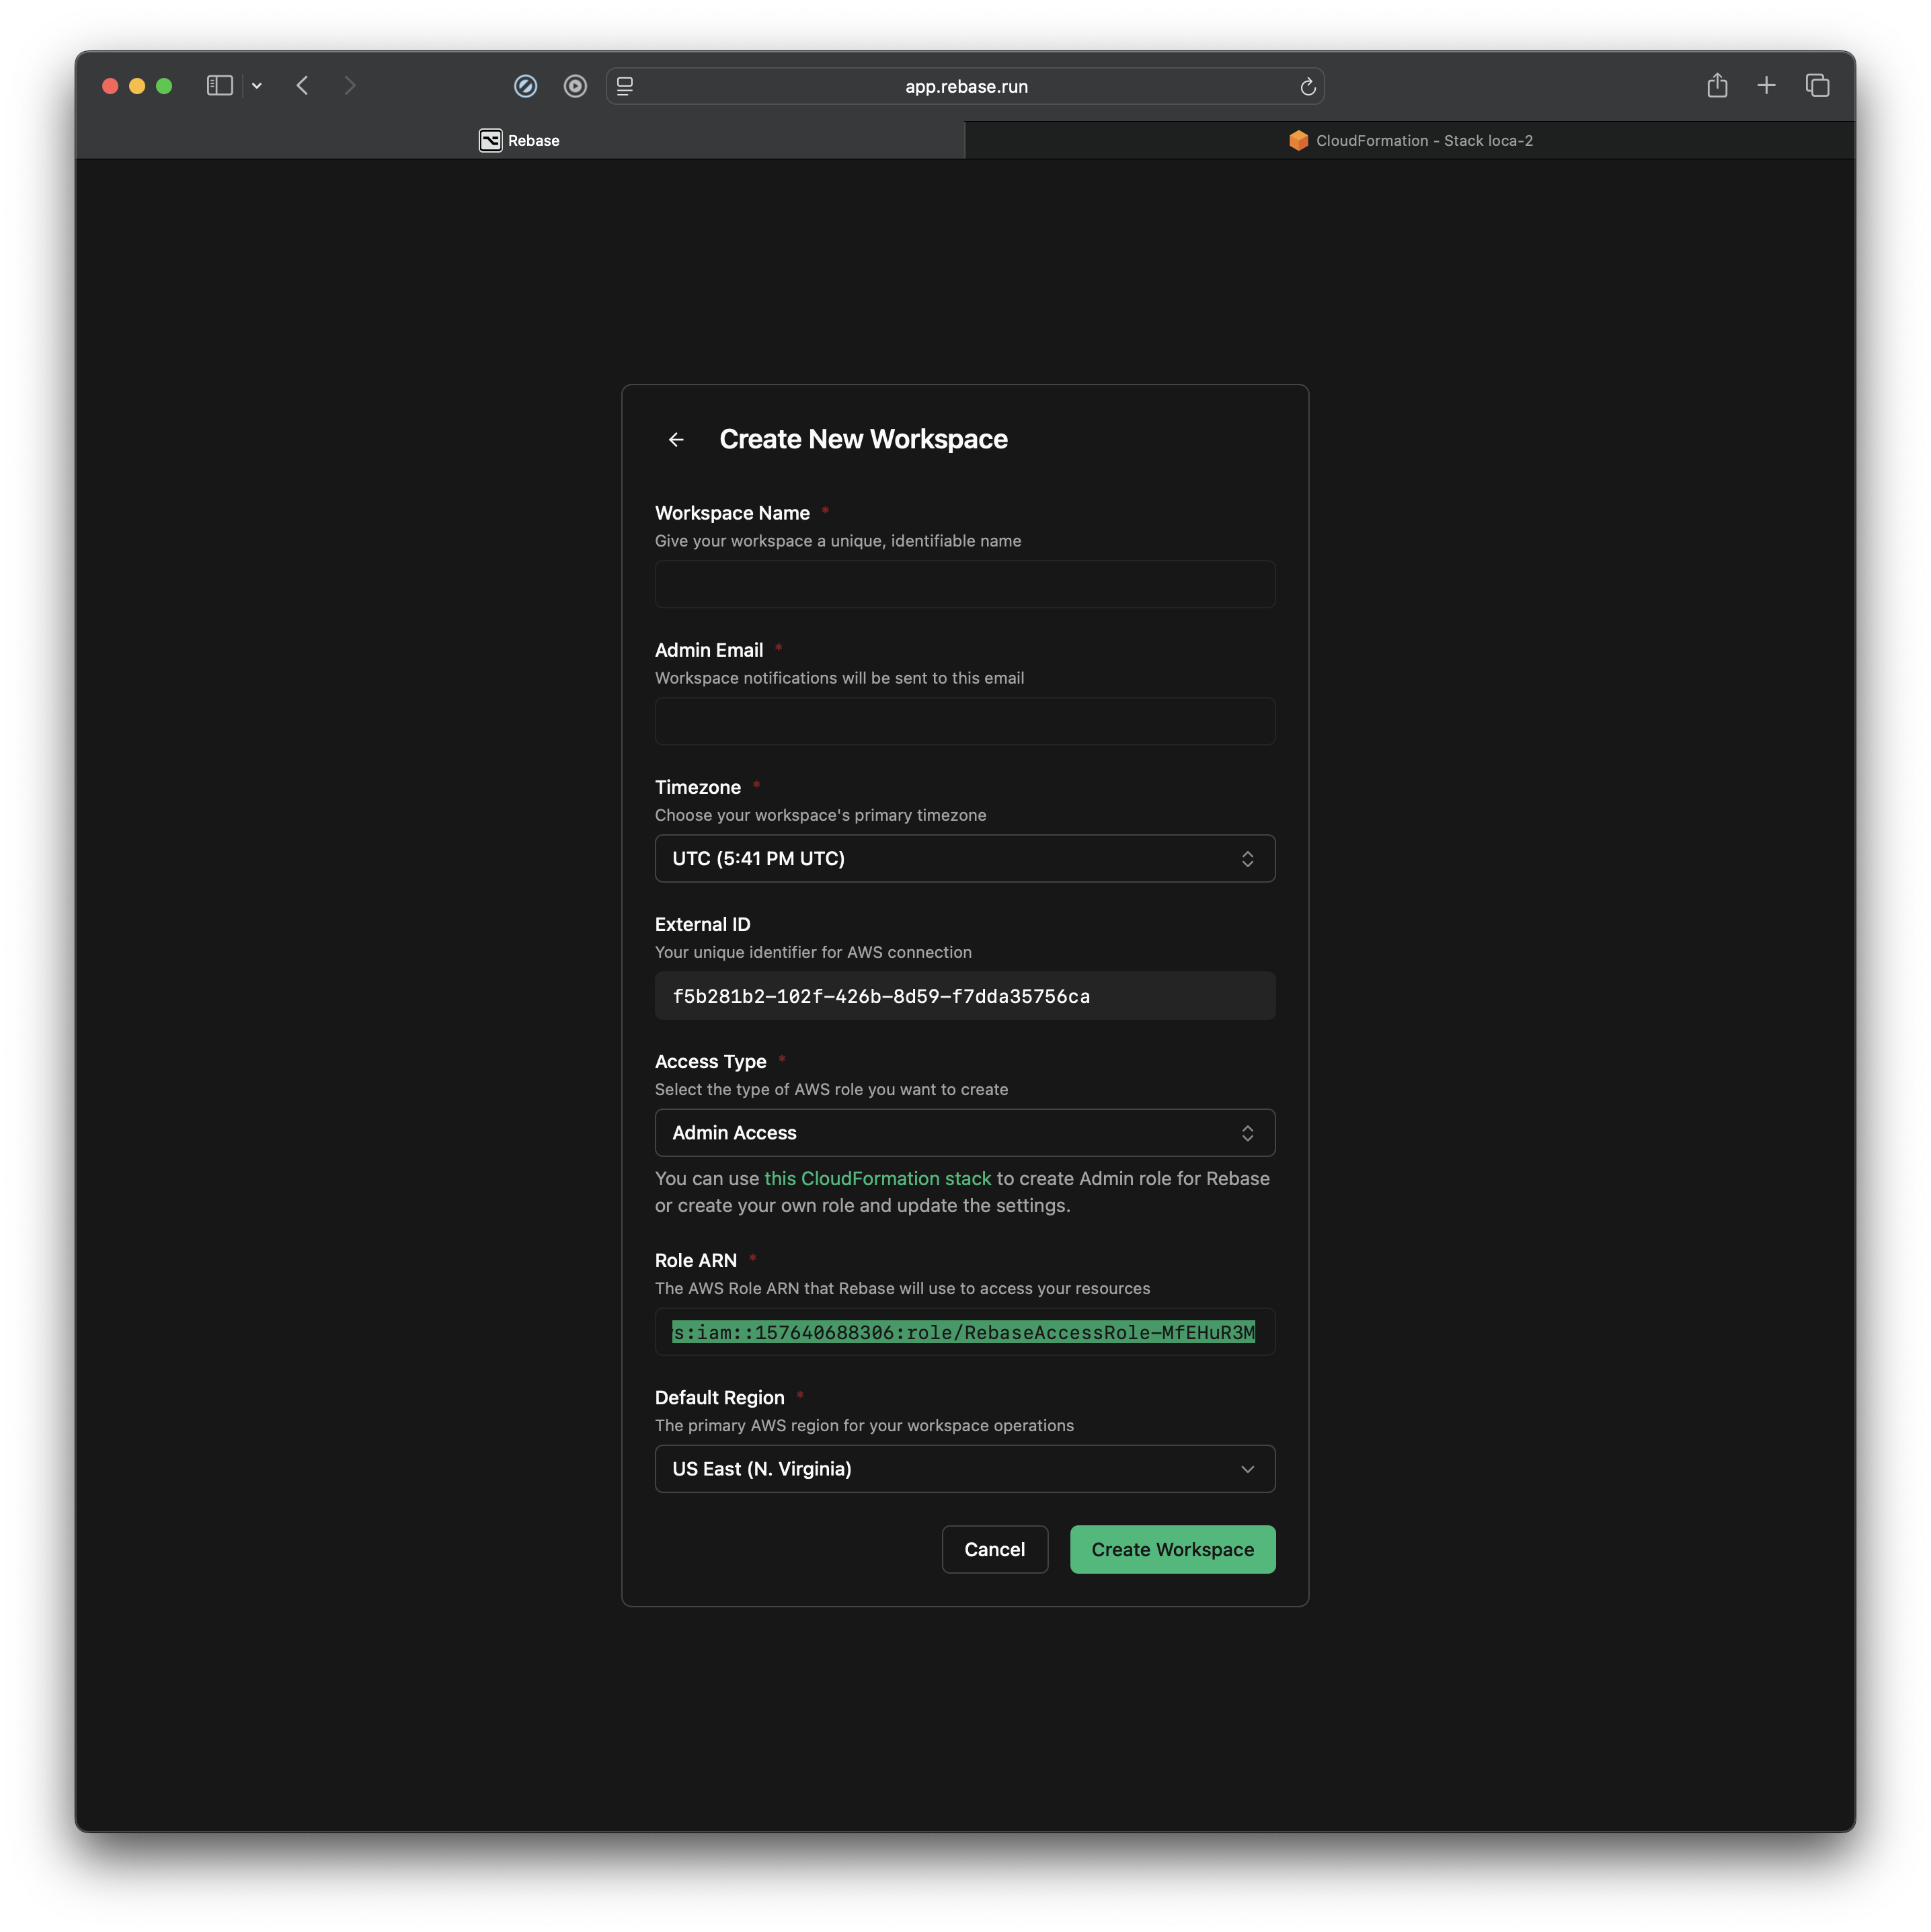
- Workspace Name: You can name it anything. We like to name the workspaces that are similar to AWS accounts we are connecting so we can remember which AWS account its connected to.
- Admin Email: Enter the email where you would like to receive notifications and emails regarding alerts for this workspace.
- Timezone: Enter the right timezone you are in. So conversations can be tied to the dates. E.g. When you ask ‘
Yesterday’ Or ‘Last week’ Rebase knows exactly what you are asking. - External ID: This is your Unique Identified for AWS connection. (According to AWS’s best practices)
- Access Type: This is the Access control you want to give to this user. You can switch between Admin, Power, and Read Only. More on Access Roles here.
- Role ARN: The AWS Role ARN that Rebase will use to access your resources. Below you can see where to find the Role ARN once you have created a CloudFormation Stack inside your AWS account.
- Default Region: The primary AWS region for your workspace operations. Keep the Region of your AWS account and Rebase Workspace same to avoid any hiccups.

Prerequisites: It will require you to Login to your AWS account. Make sure to select the right AWS account that you want to connect with Rebase.
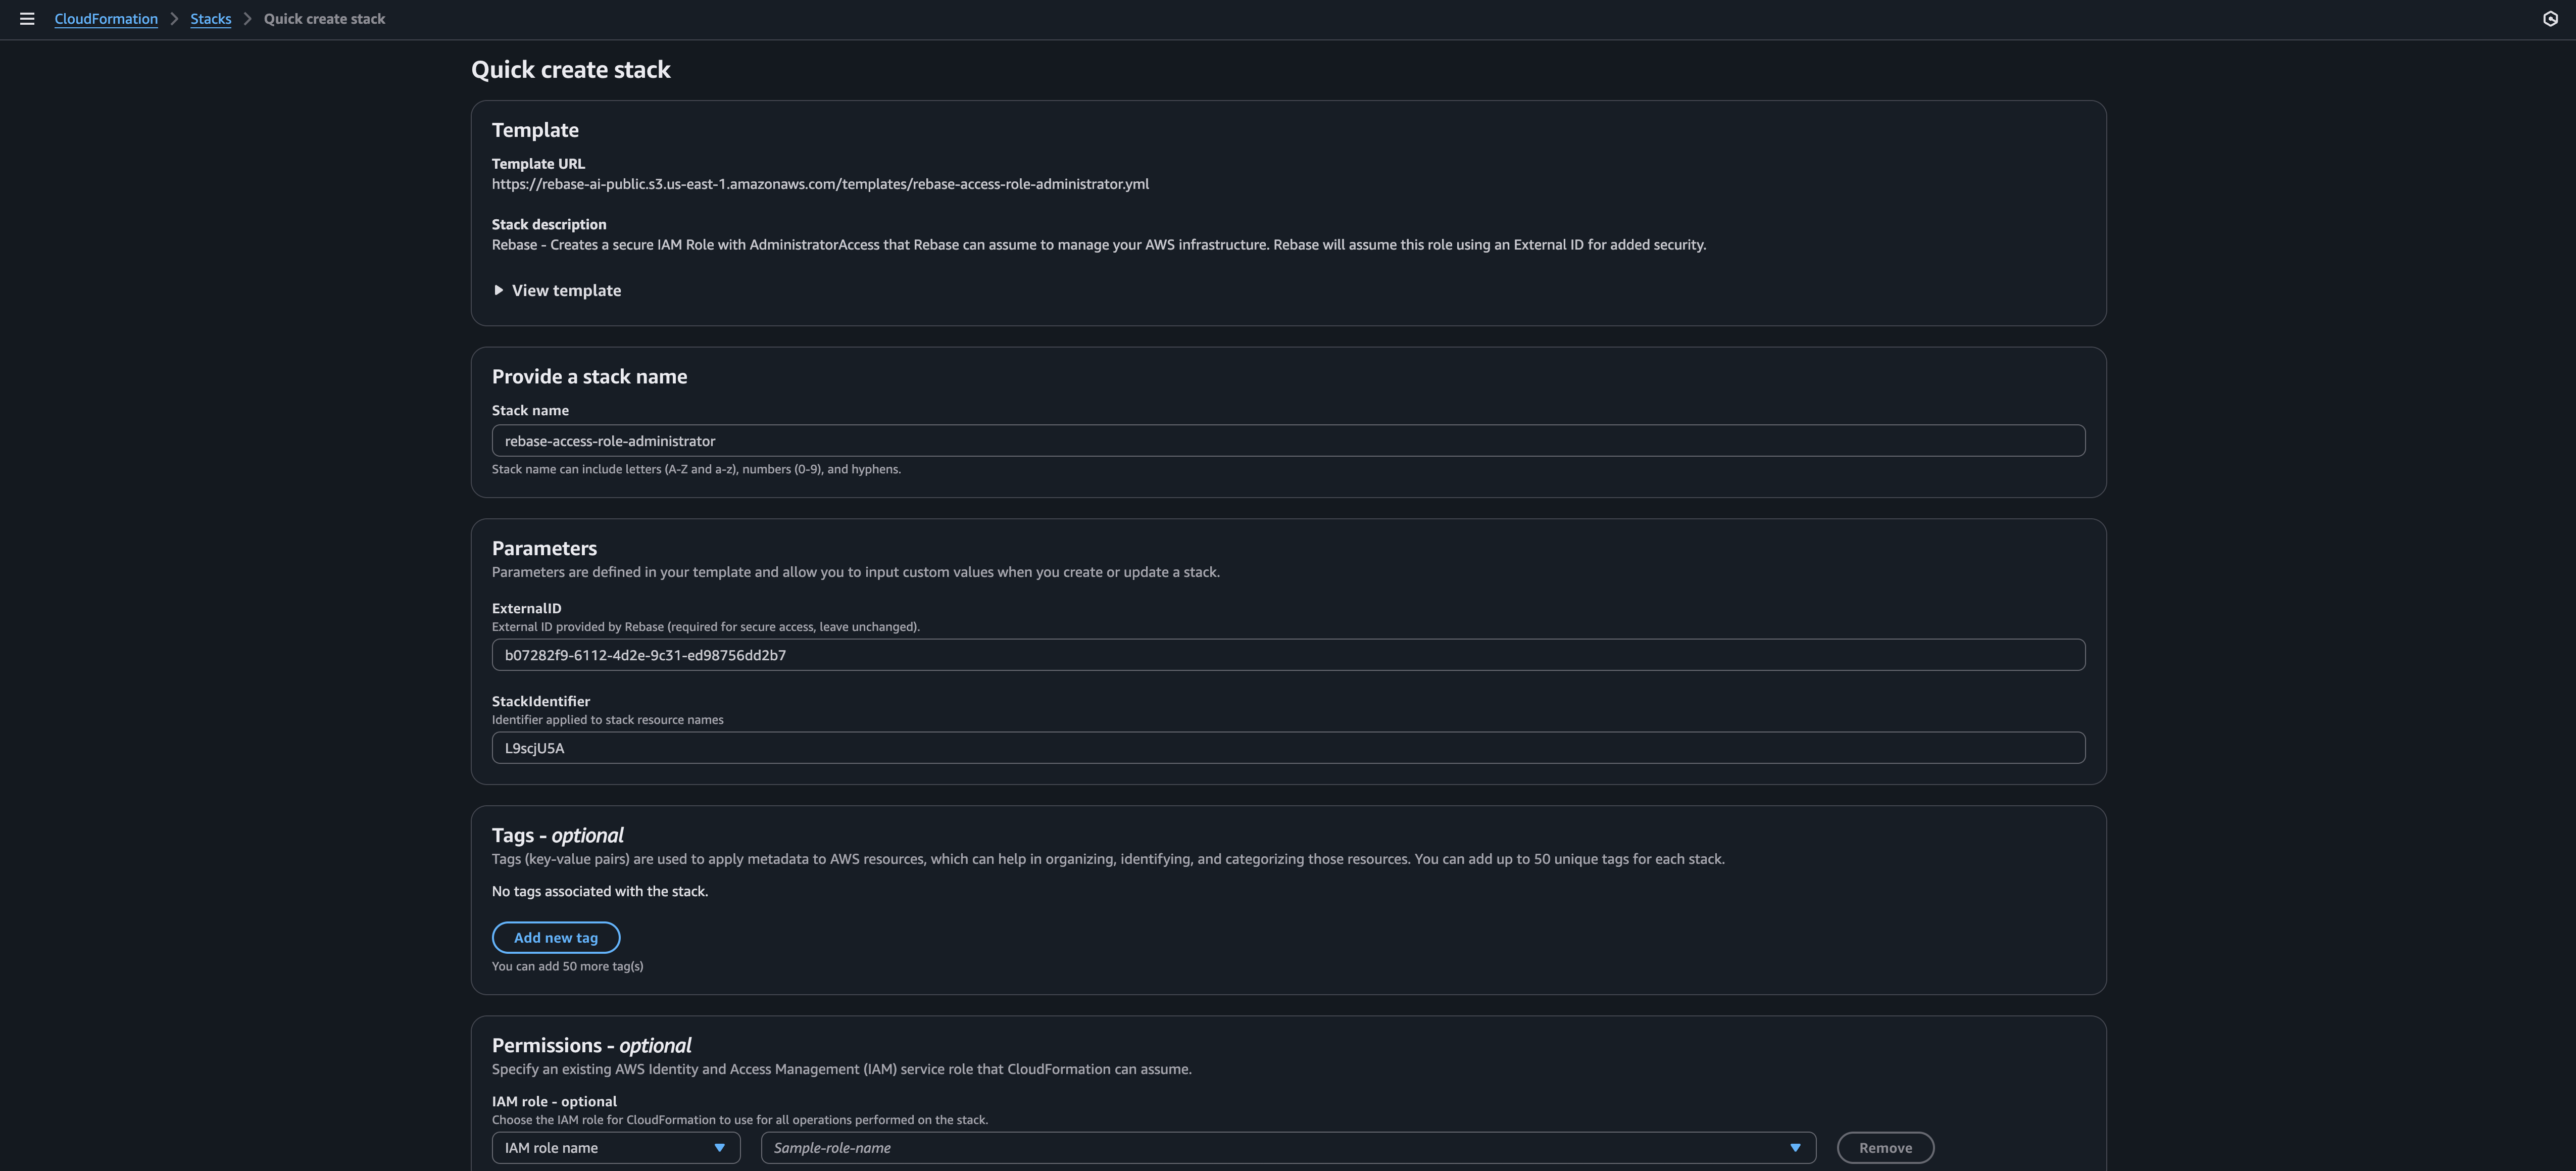 If you have been working with AWS and Cloudformation, you already know this. If this is your first time, we are using STS Connection by creating a CF stack to get the access for rebase.
Its secure and standard way (recommended by AWS) to use it.
If you are curious about the YAML template, you can click on View Template Or see the YAML code below:
If you have been working with AWS and Cloudformation, you already know this. If this is your first time, we are using STS Connection by creating a CF stack to get the access for rebase.
Its secure and standard way (recommended by AWS) to use it.
If you are curious about the YAML template, you can click on View Template Or see the YAML code below:
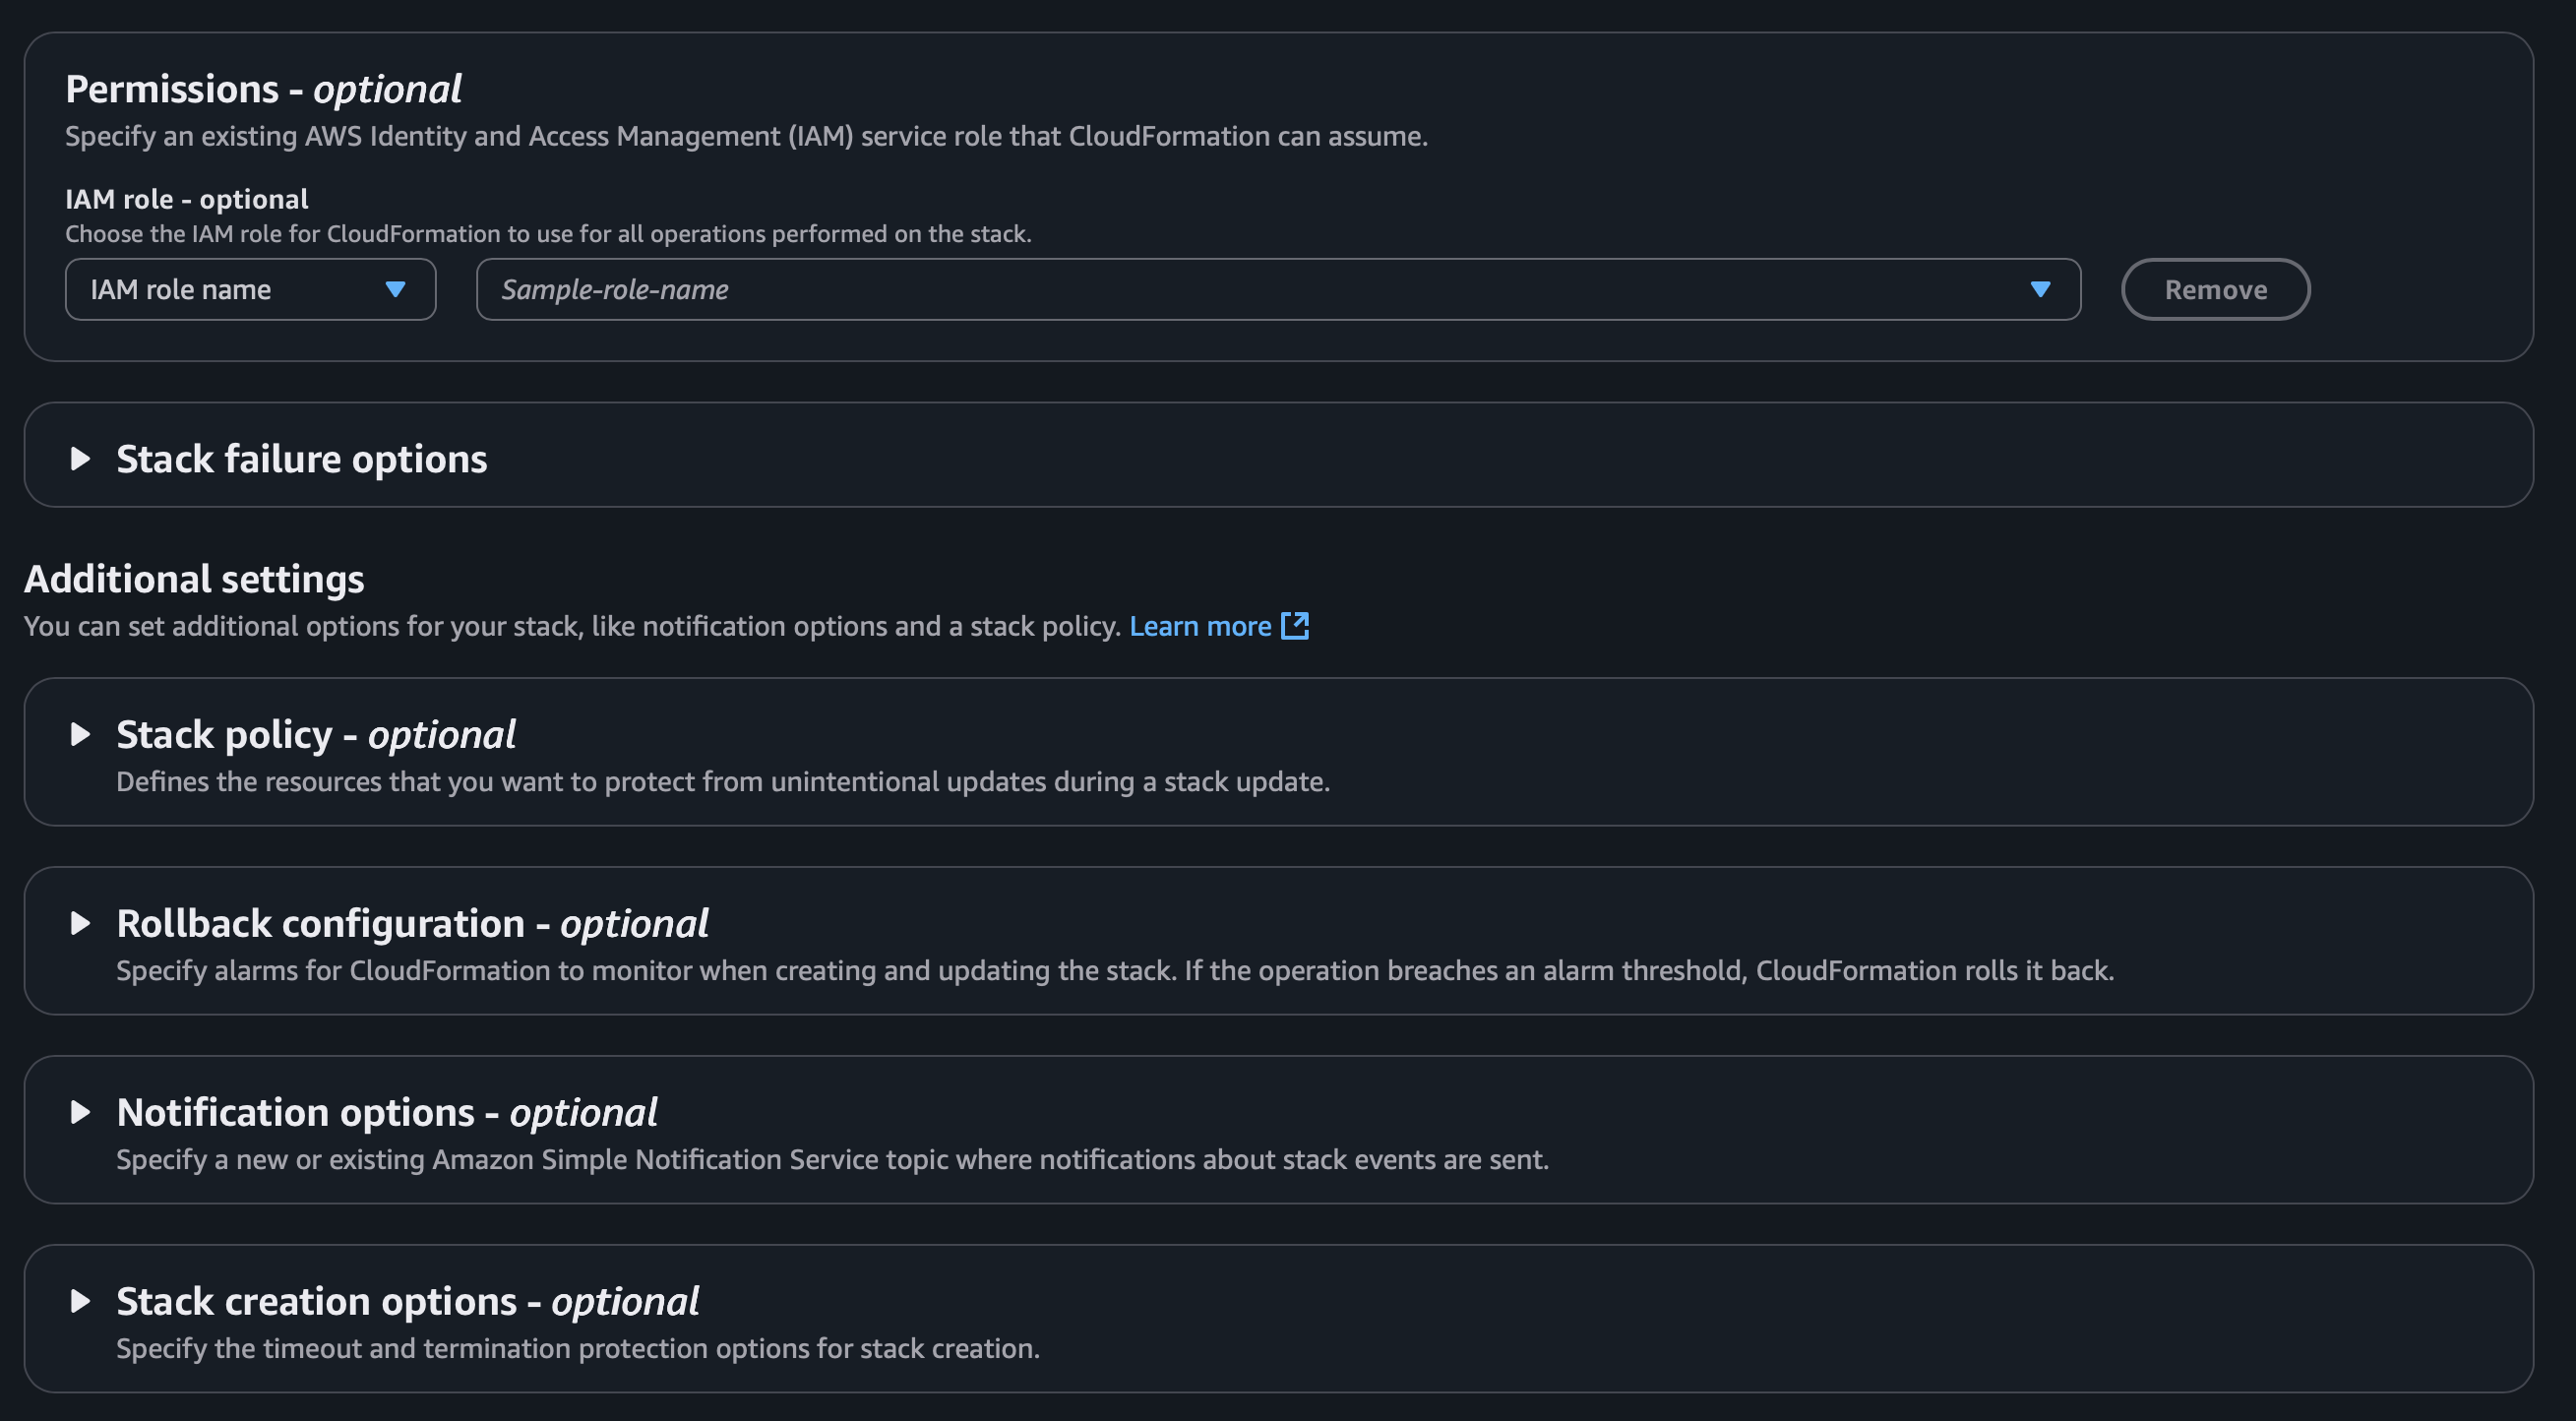
 Once done, you can scroll to the bottom. You can select additional permissions here if you would like.
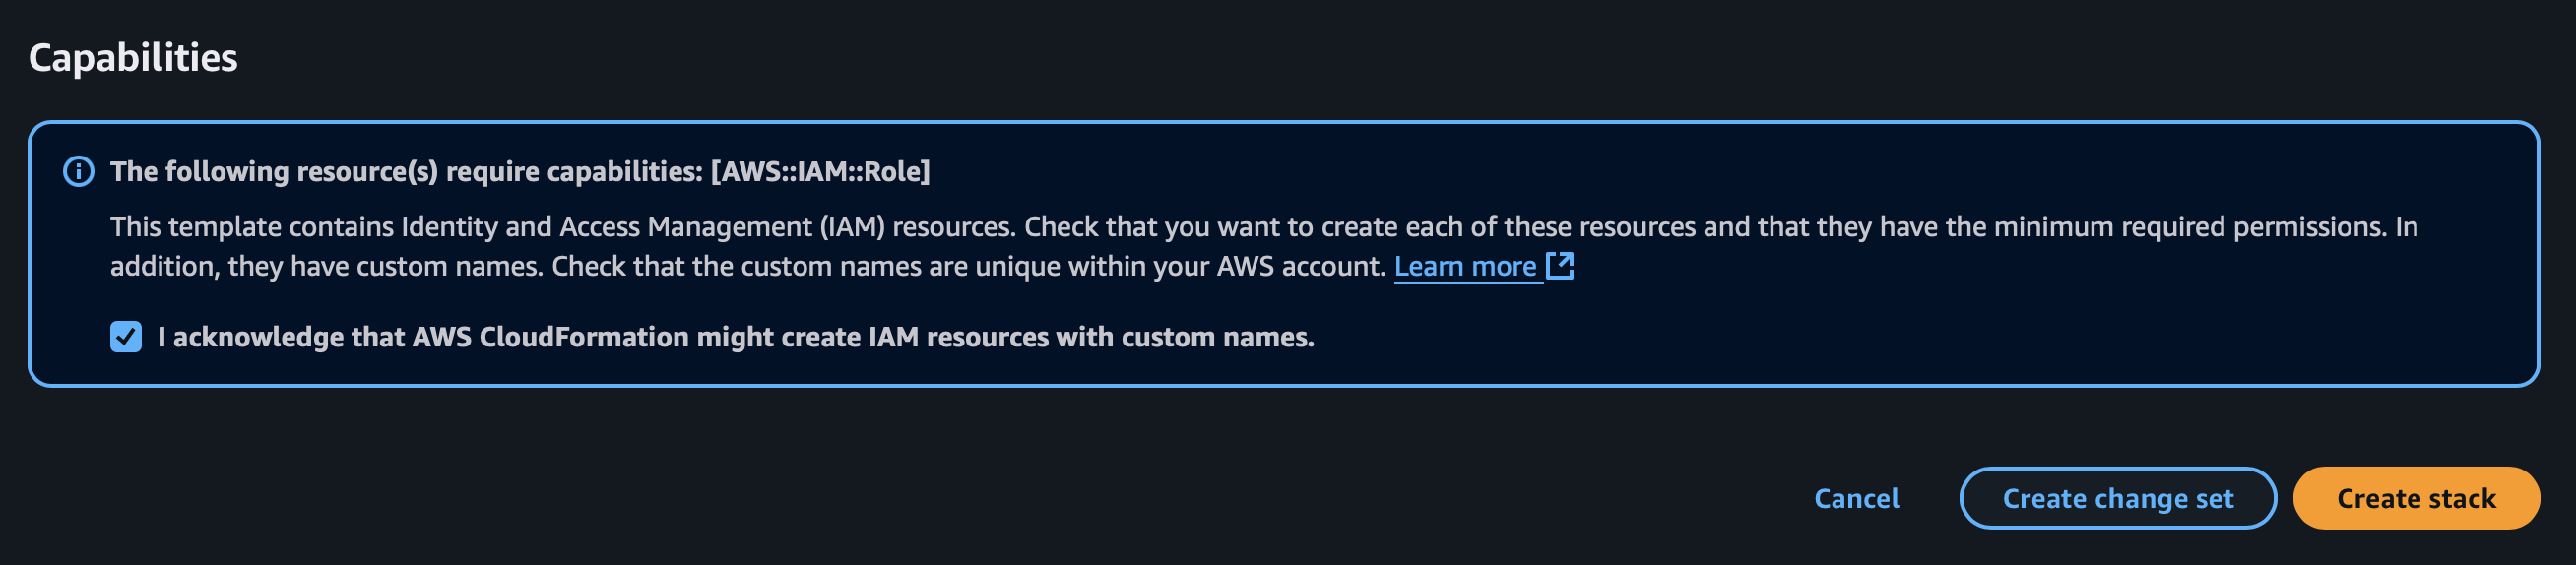
 After that just check the
Capabilities box and hit Create Stack.
 AWS will take a few mins to create the desired stack for you.
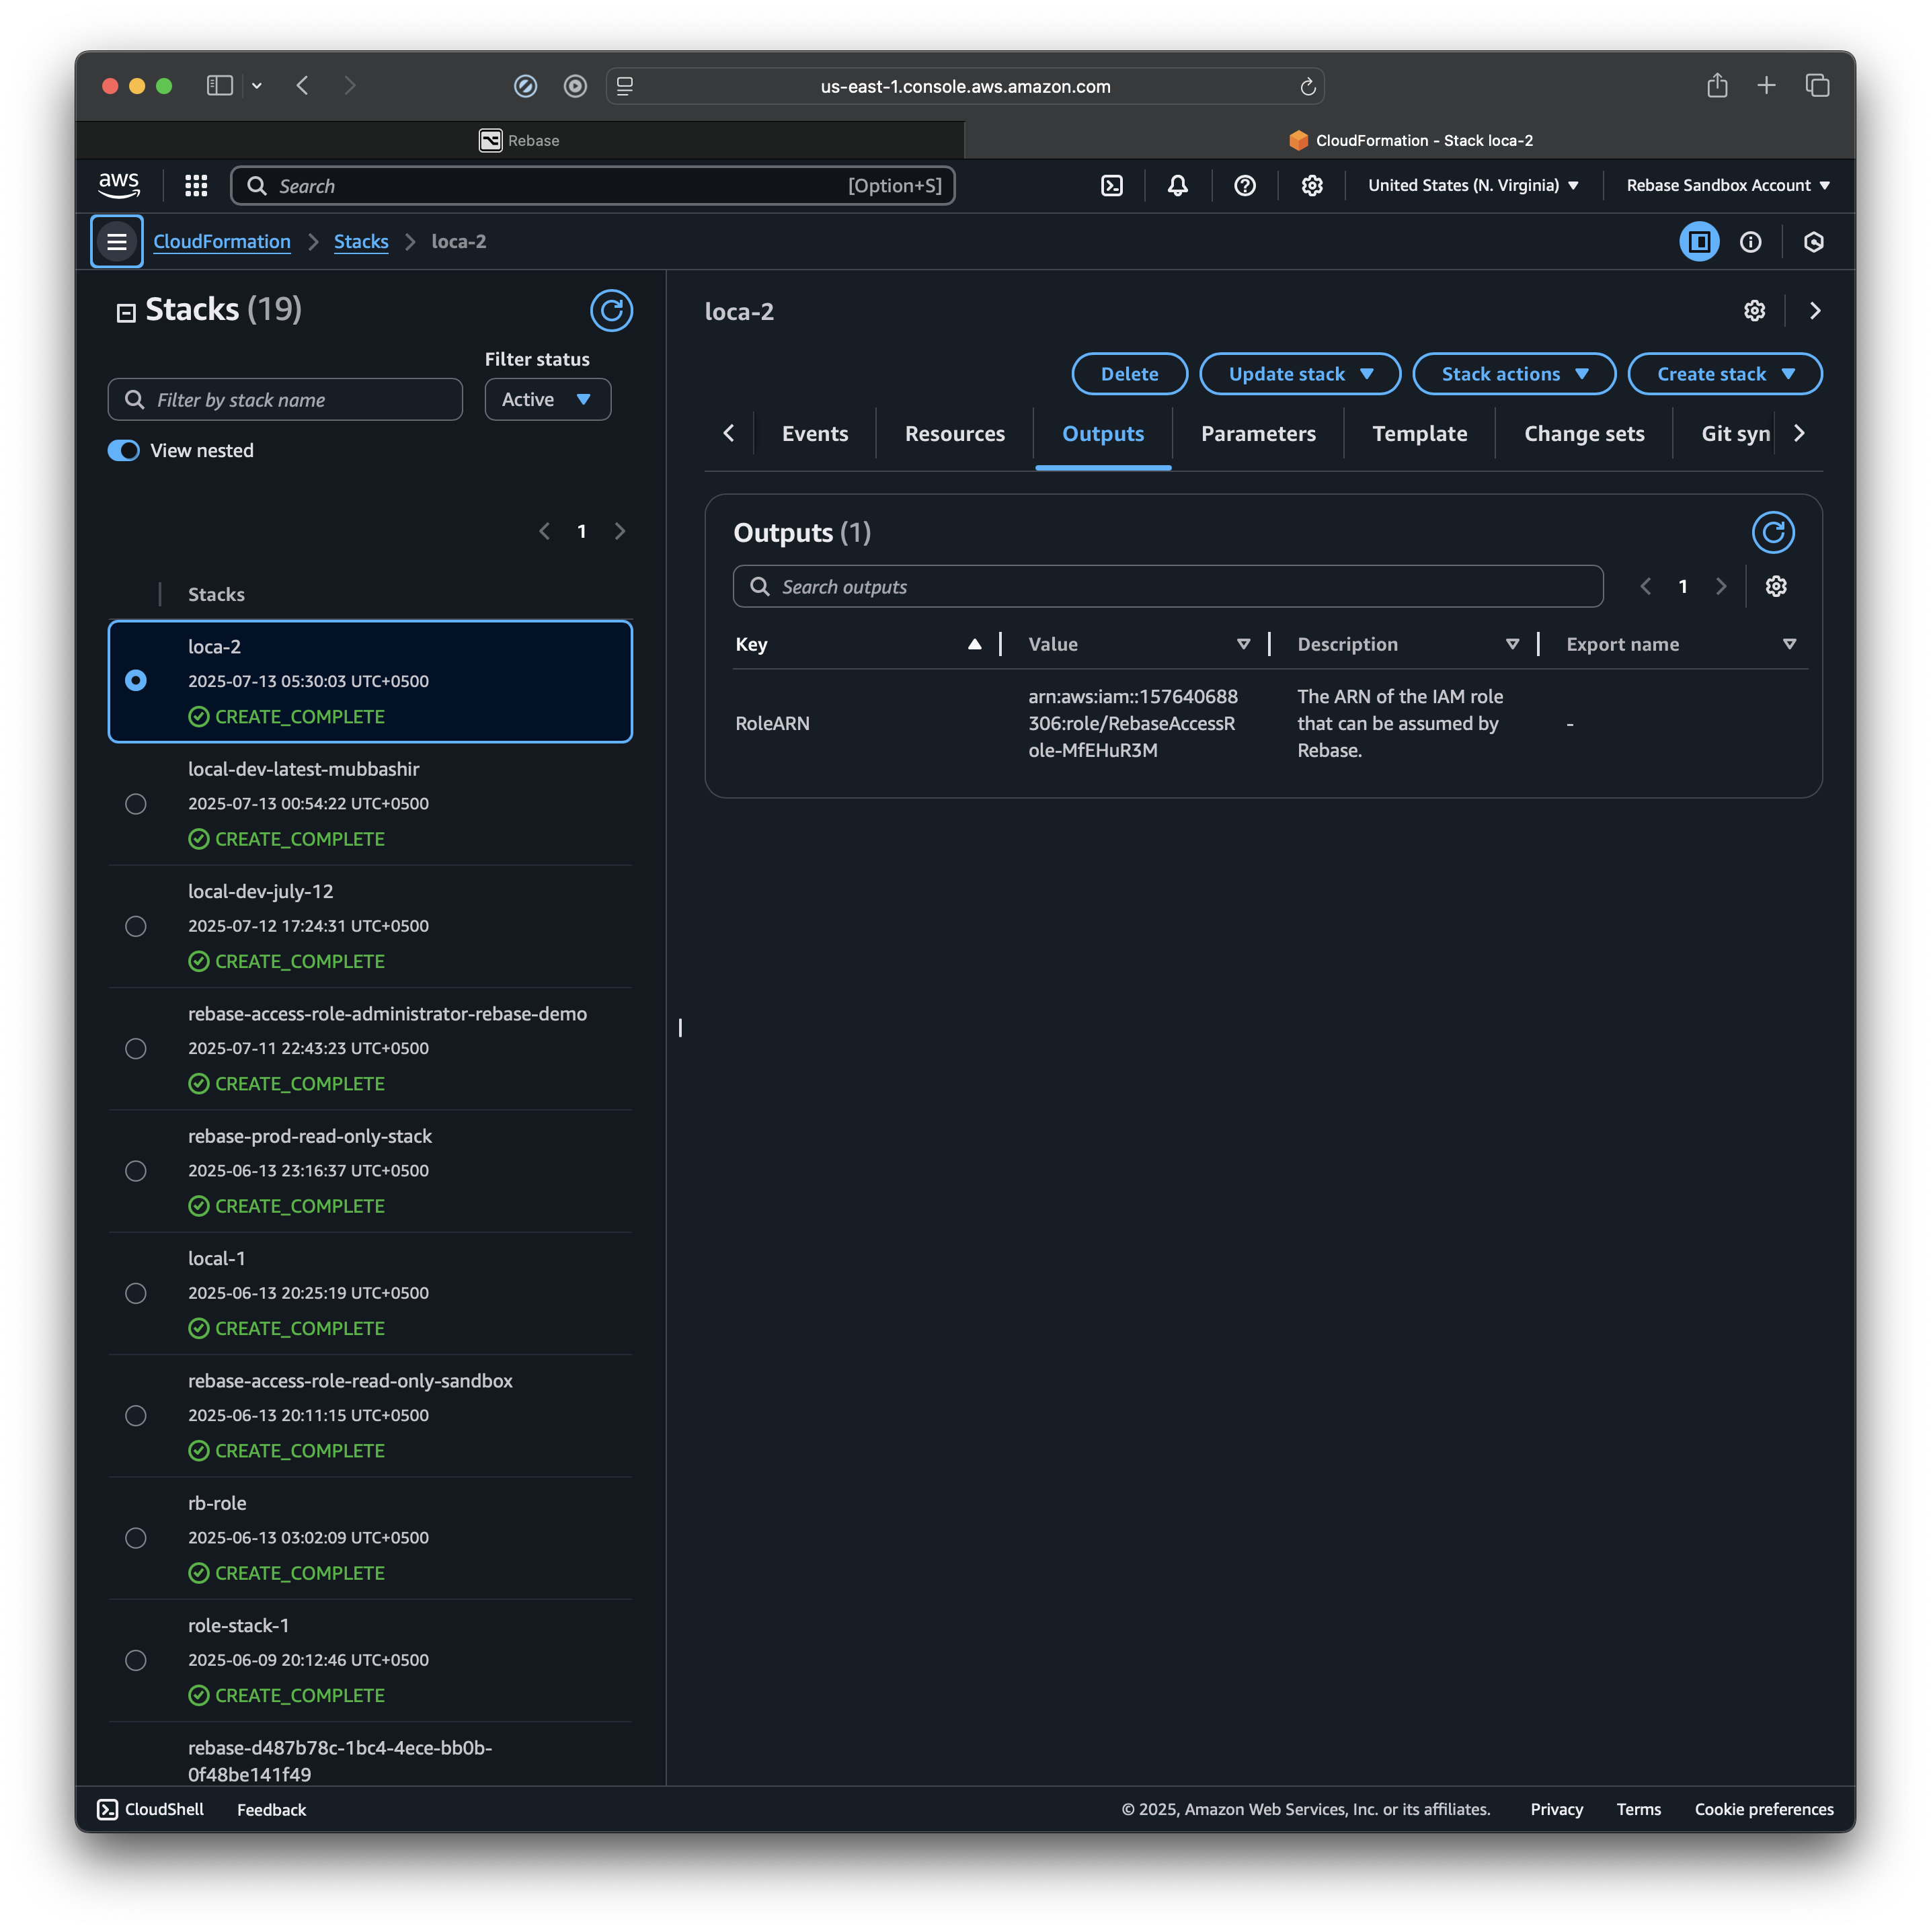 This is what it will look like once the stack is created.
Select the
This is what it will look like once the stack is created.
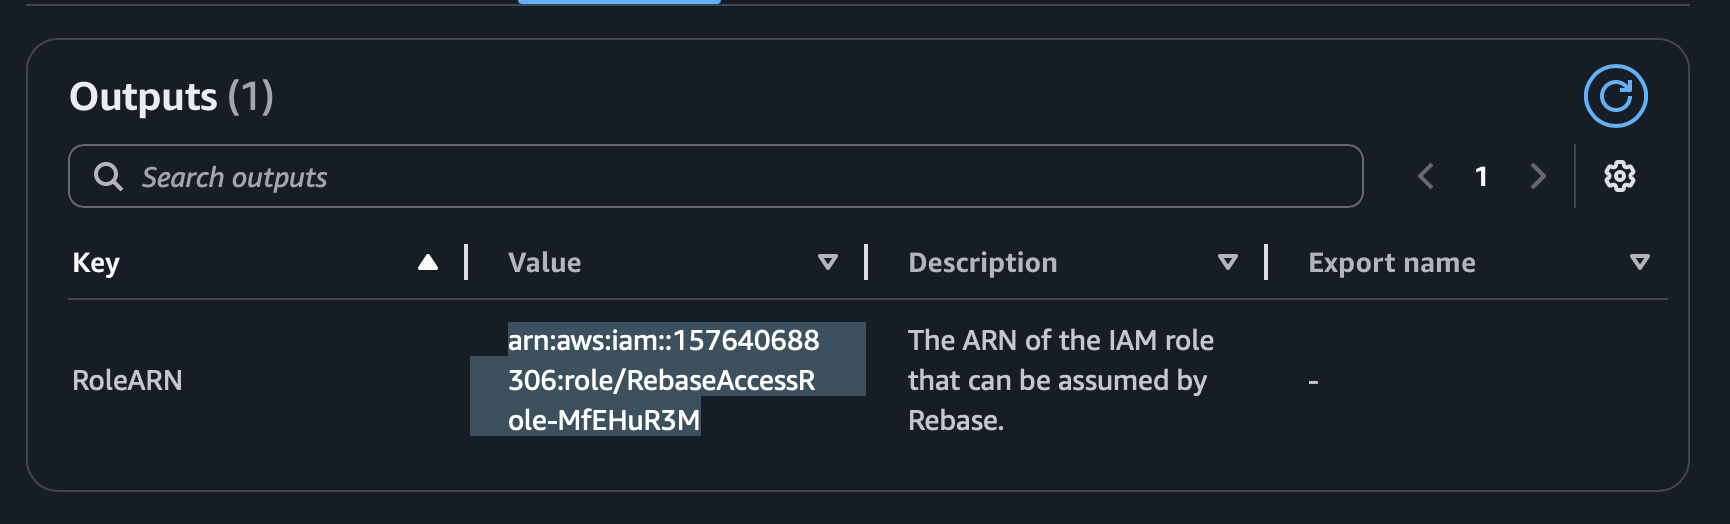
Select the Role ARN value here and go back to the Rebase window and paste that value under Role ARN field.
 Just click
 Create Workspace and you are done.
You will see this main window now. You are all set to start talking to your infrastructure.
 Not sure what to ask? see the most used
 Prompts or read our use cases here.