Prerequisites
Before connecting your AWS account, make sure you have:- An active AWS account with admin permissions
- Access to the AWS Management Console
- A Rebase account (sign up at app.rebase.run)
Connection Process
Step 1: Launch CloudFormation Stack
From your Rebase dashboard, click Create New Workspace. This will provide you with a CloudFormation template link.- Open the CloudFormation link in a new tab
- You’ll be redirected to the AWS Console
- The template will be pre-loaded with the necessary IAM roles and permissions
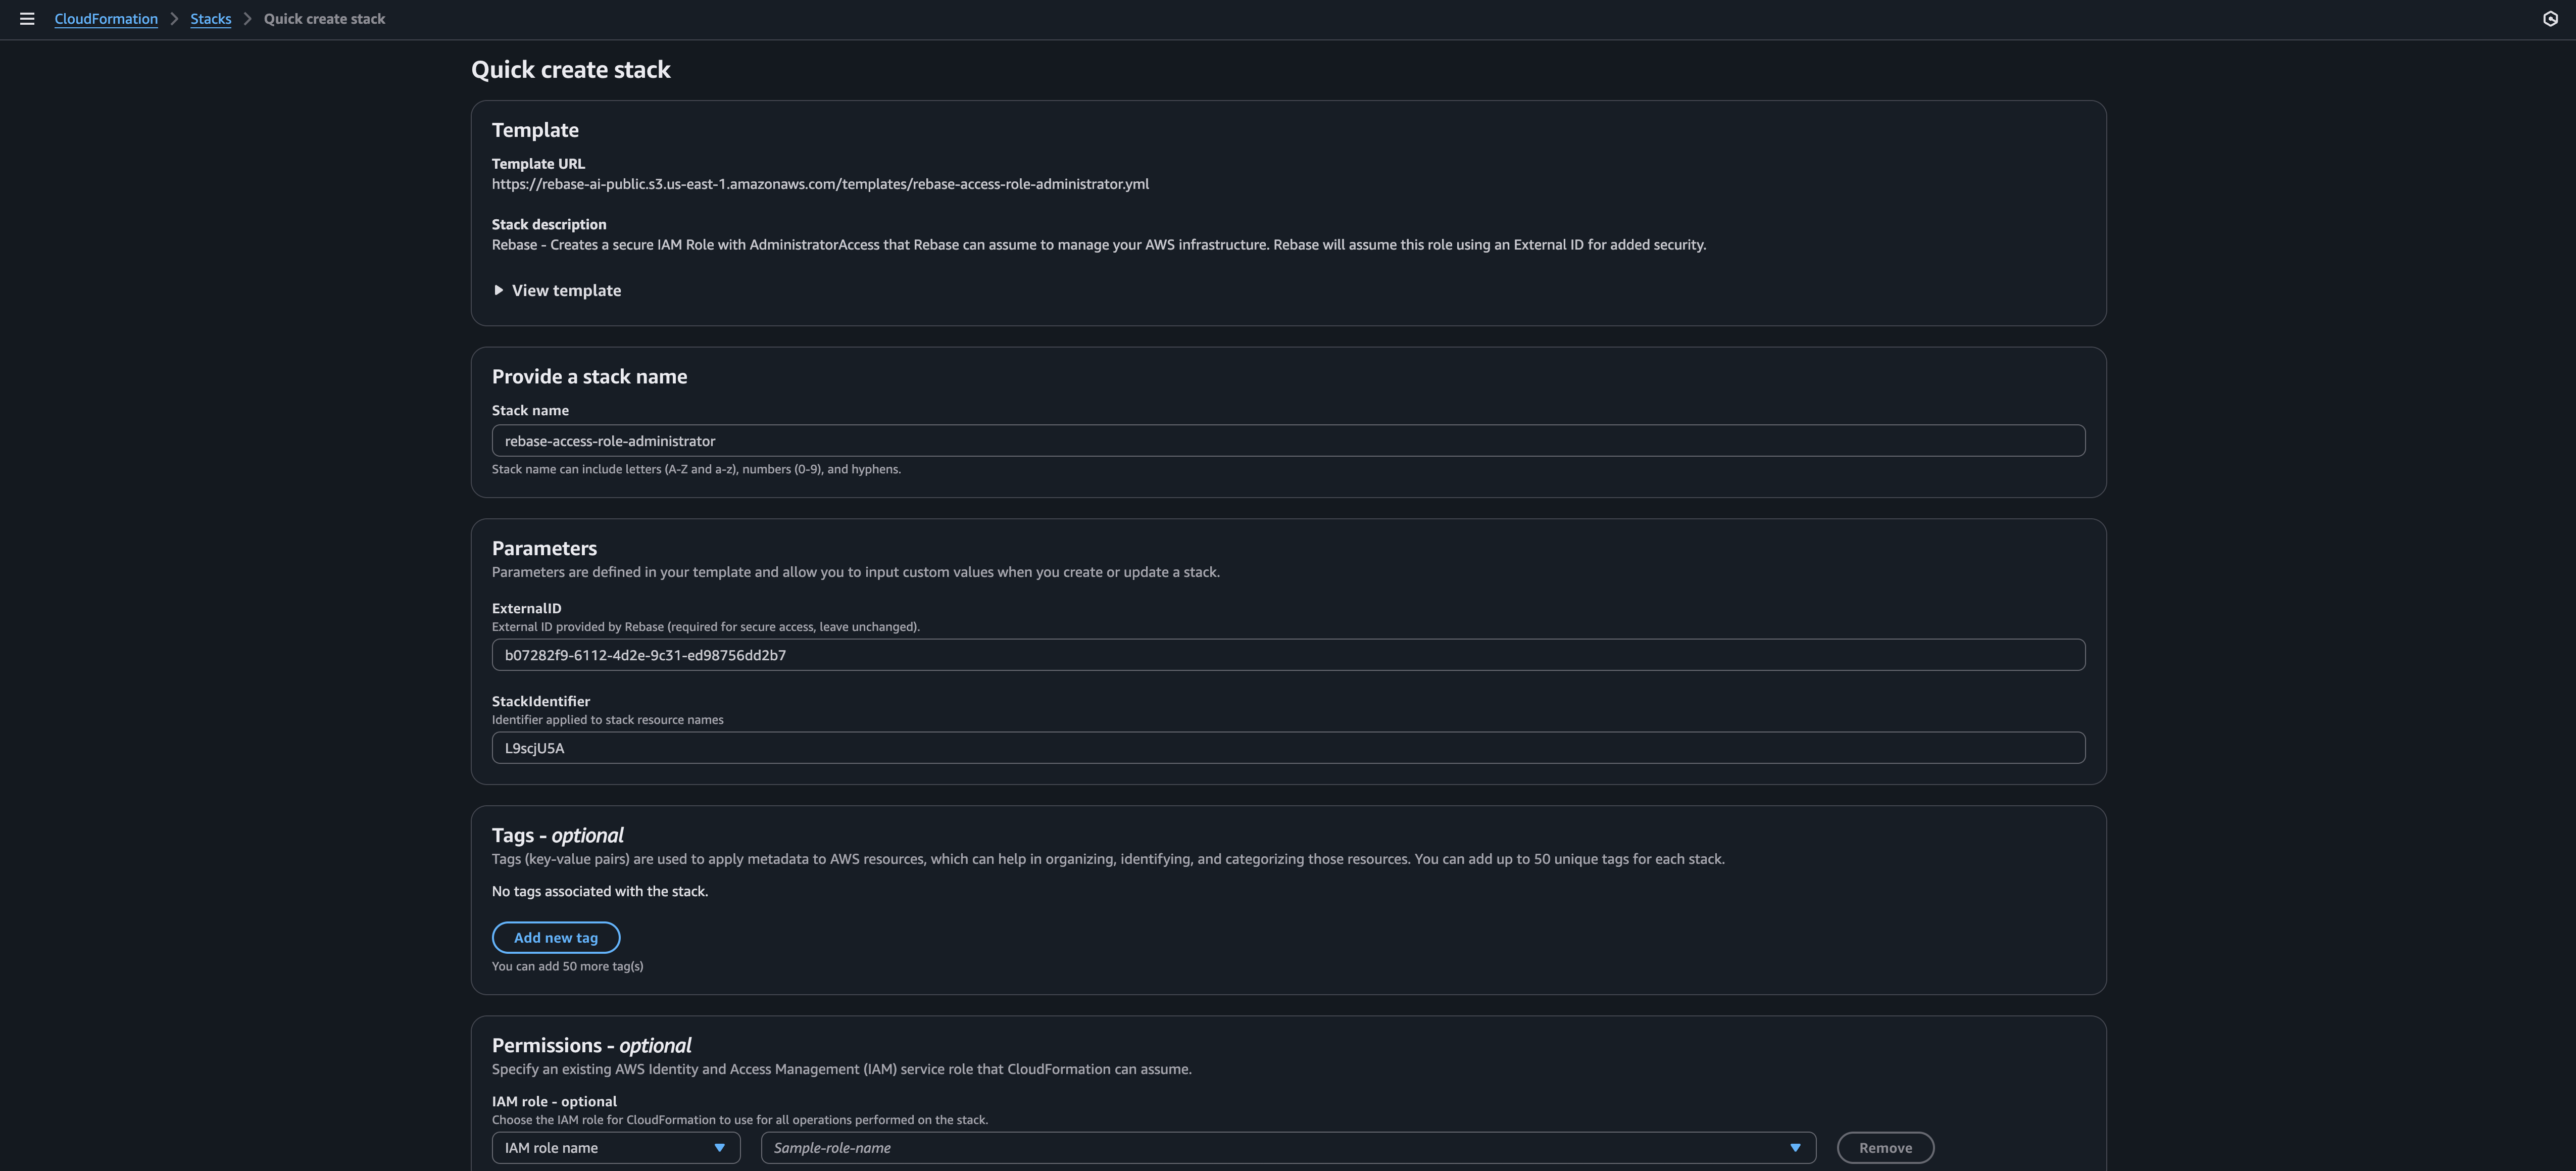
Step 2: Review the CloudFormation Template
Before deploying, you can view the template to understand what permissions you’re granting:Step 3: Deploy the Stack
In the AWS CloudFormation console:- Enter a stack name (make it descriptive like “Rebase-Production”)
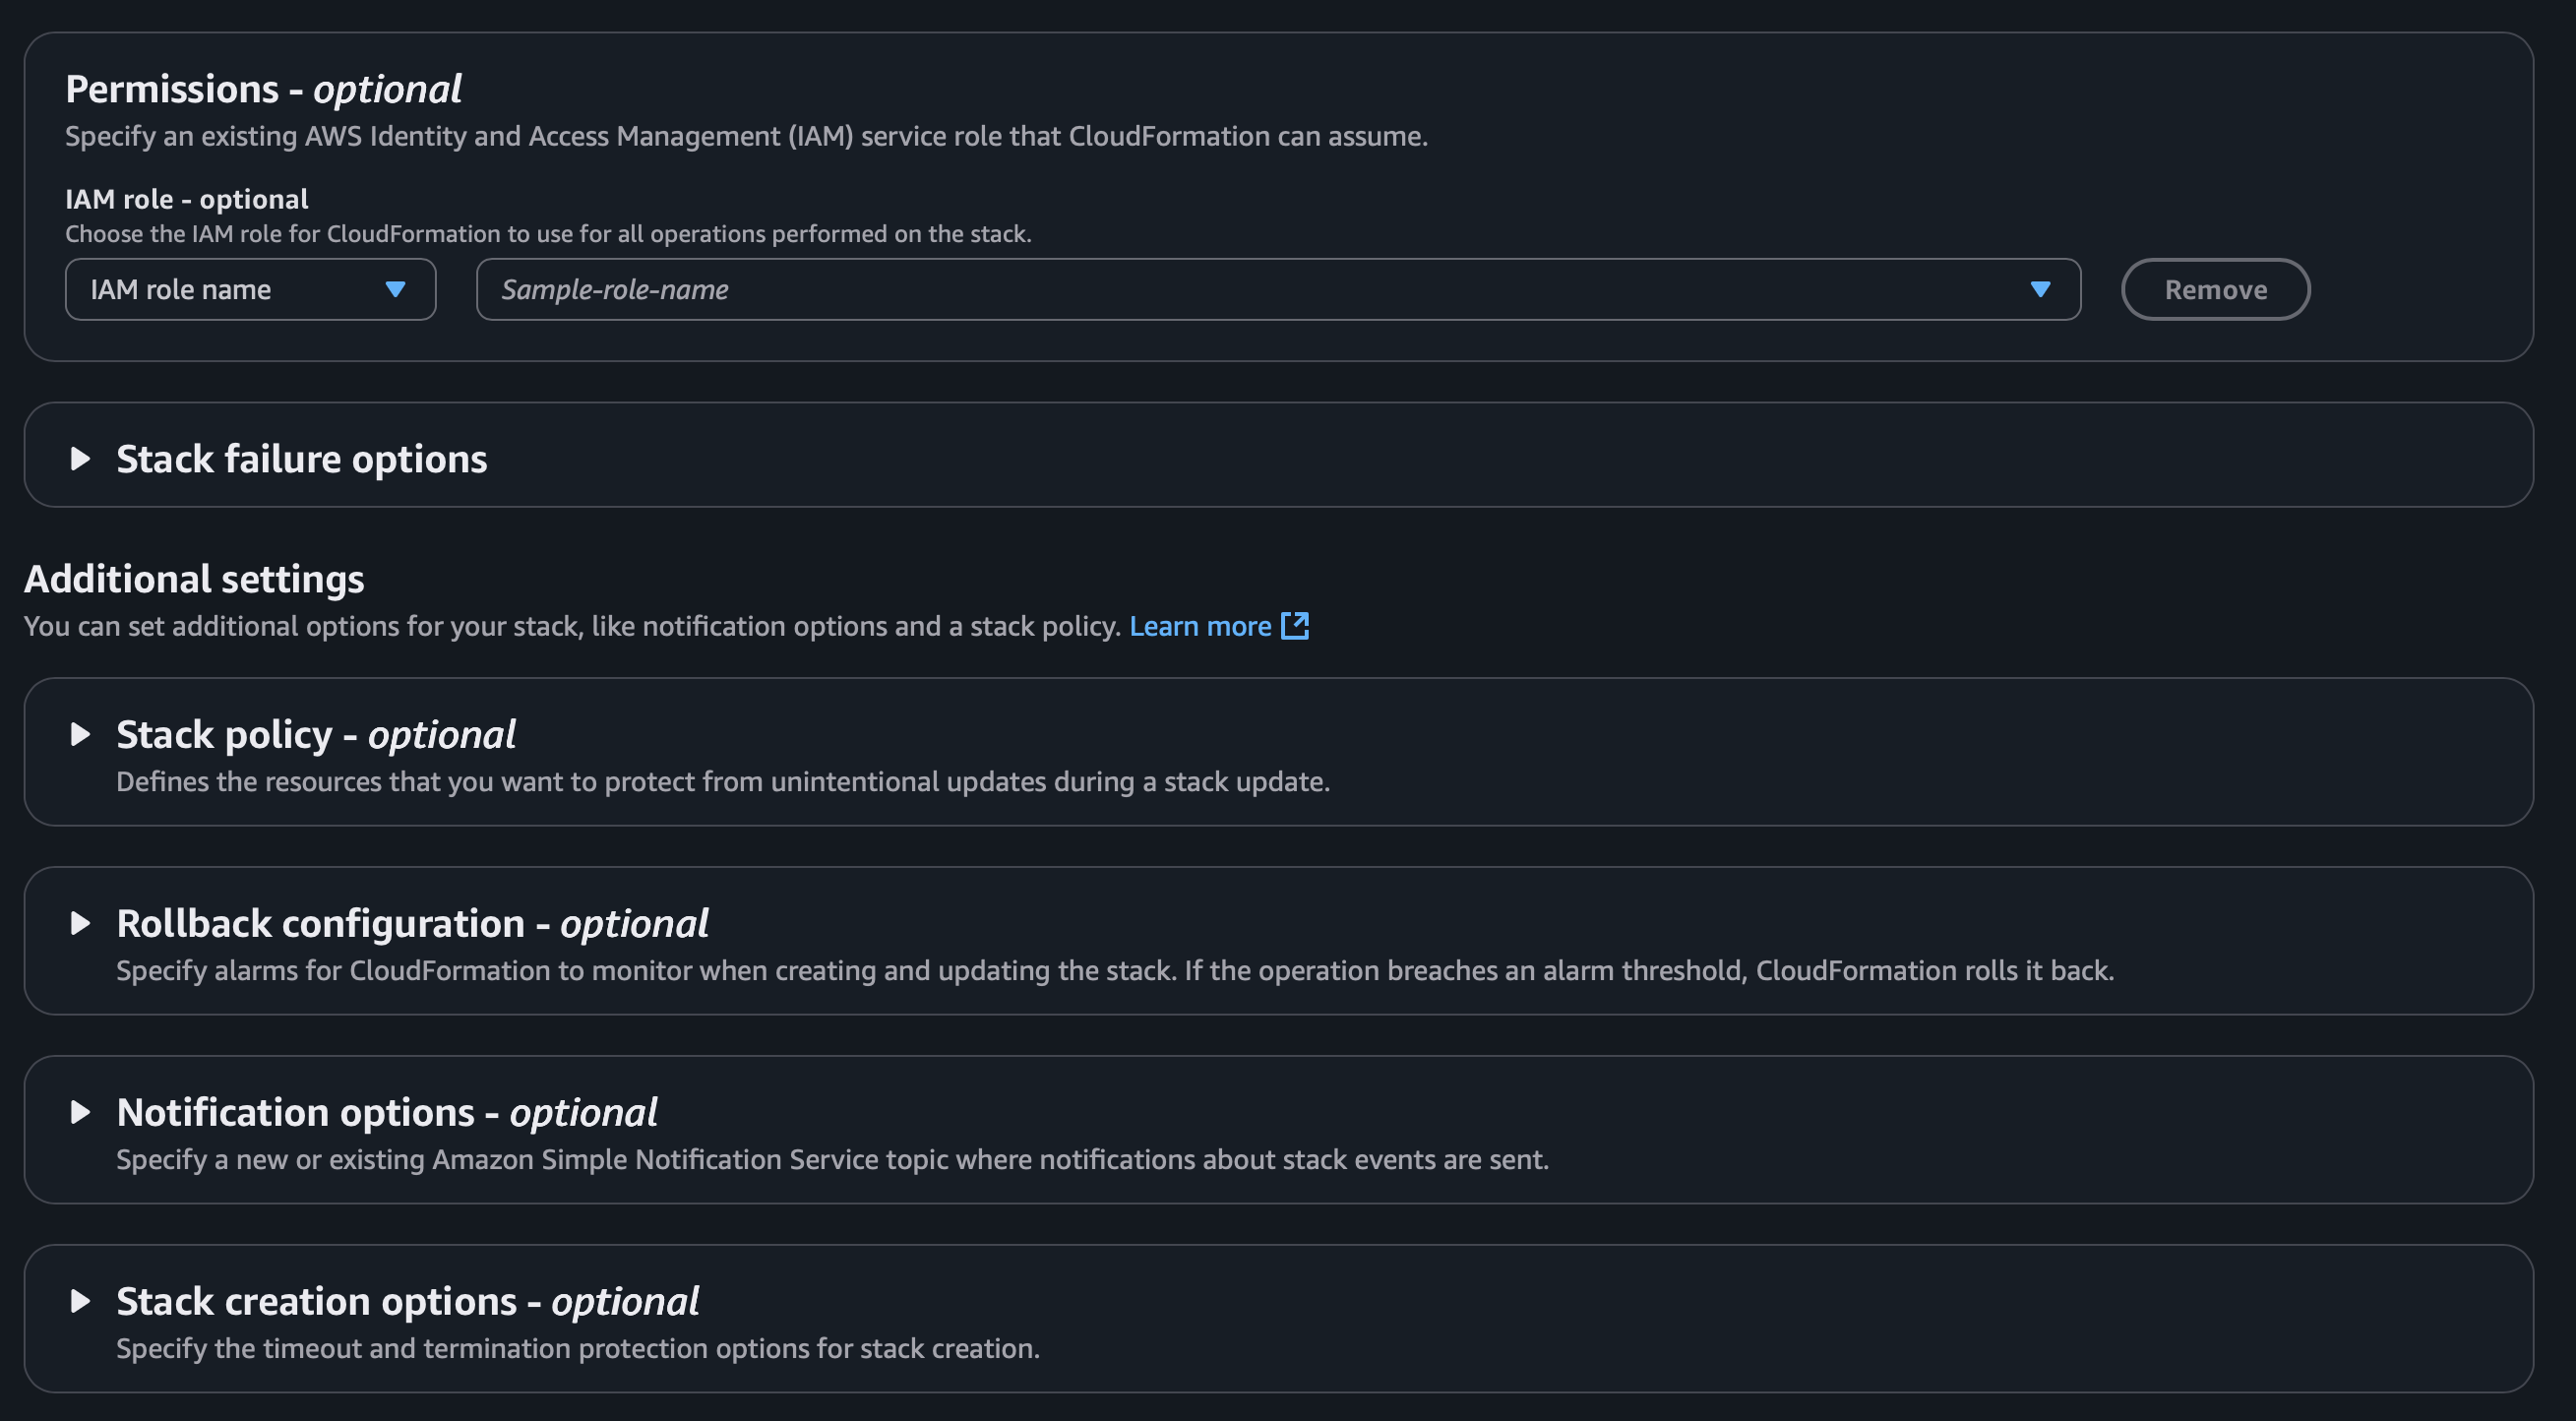
- Review the stack details (parameters are pre-filled)
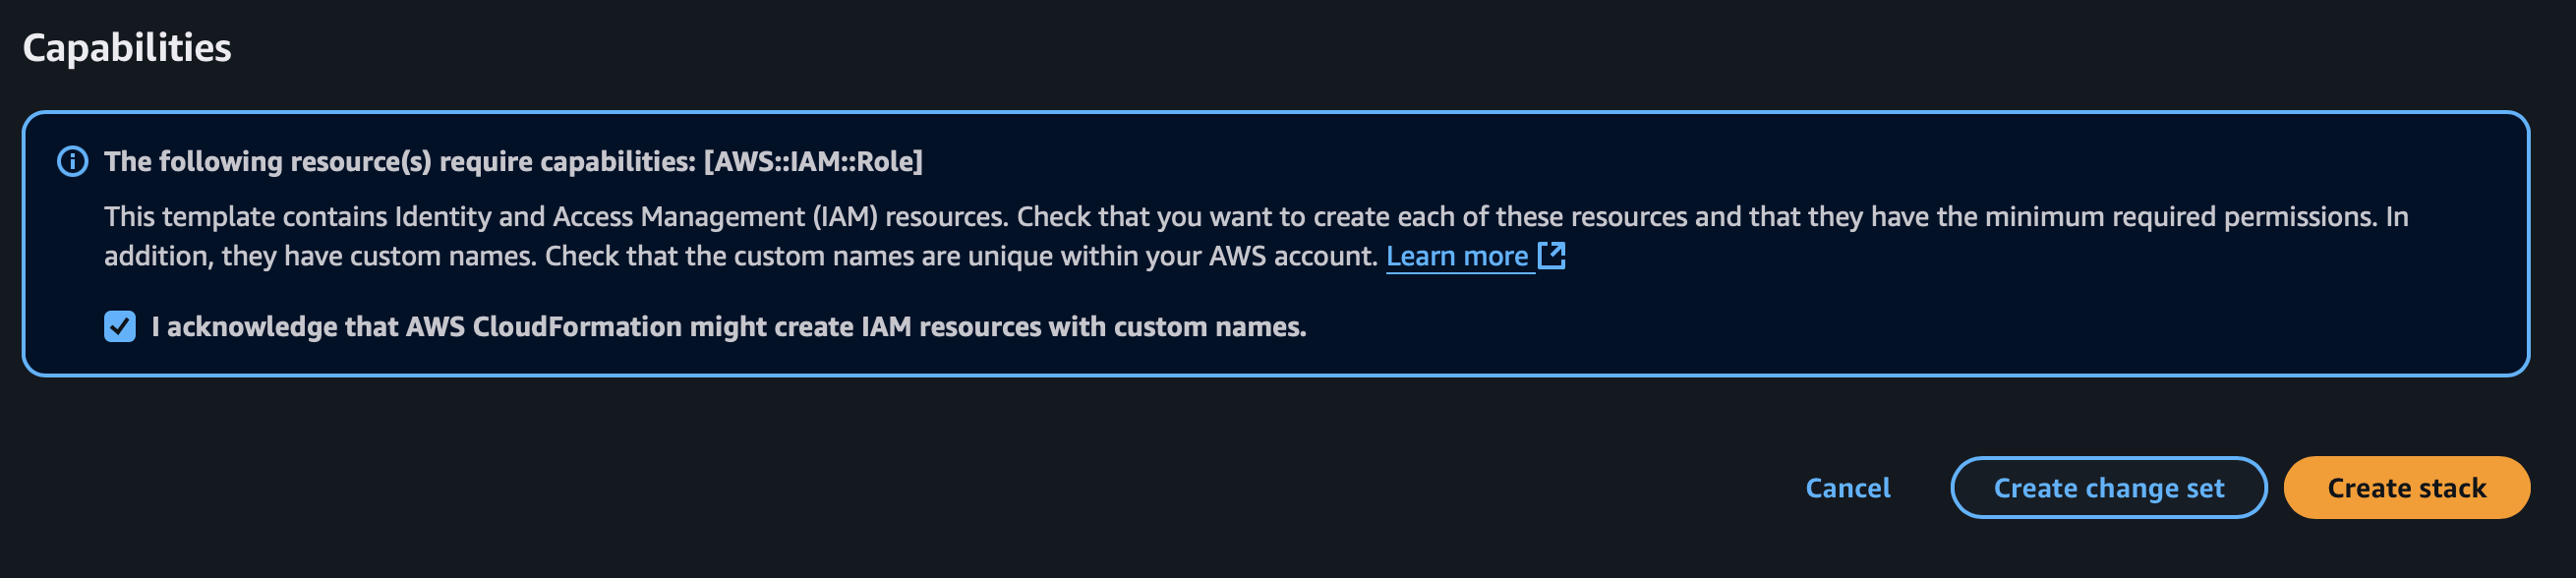
- Scroll down and check the Capabilities acknowledgment box for IAM resource creation
- Click Create Stack
 The deployment typically takes 1-2 minutes. AWS will create the necessary:
- IAM roles for secure access
- Cross-account trust relationships
- Minimum required permissions for Rebase
 AWS will create the stack (you can also see all your exisiting stacks here)
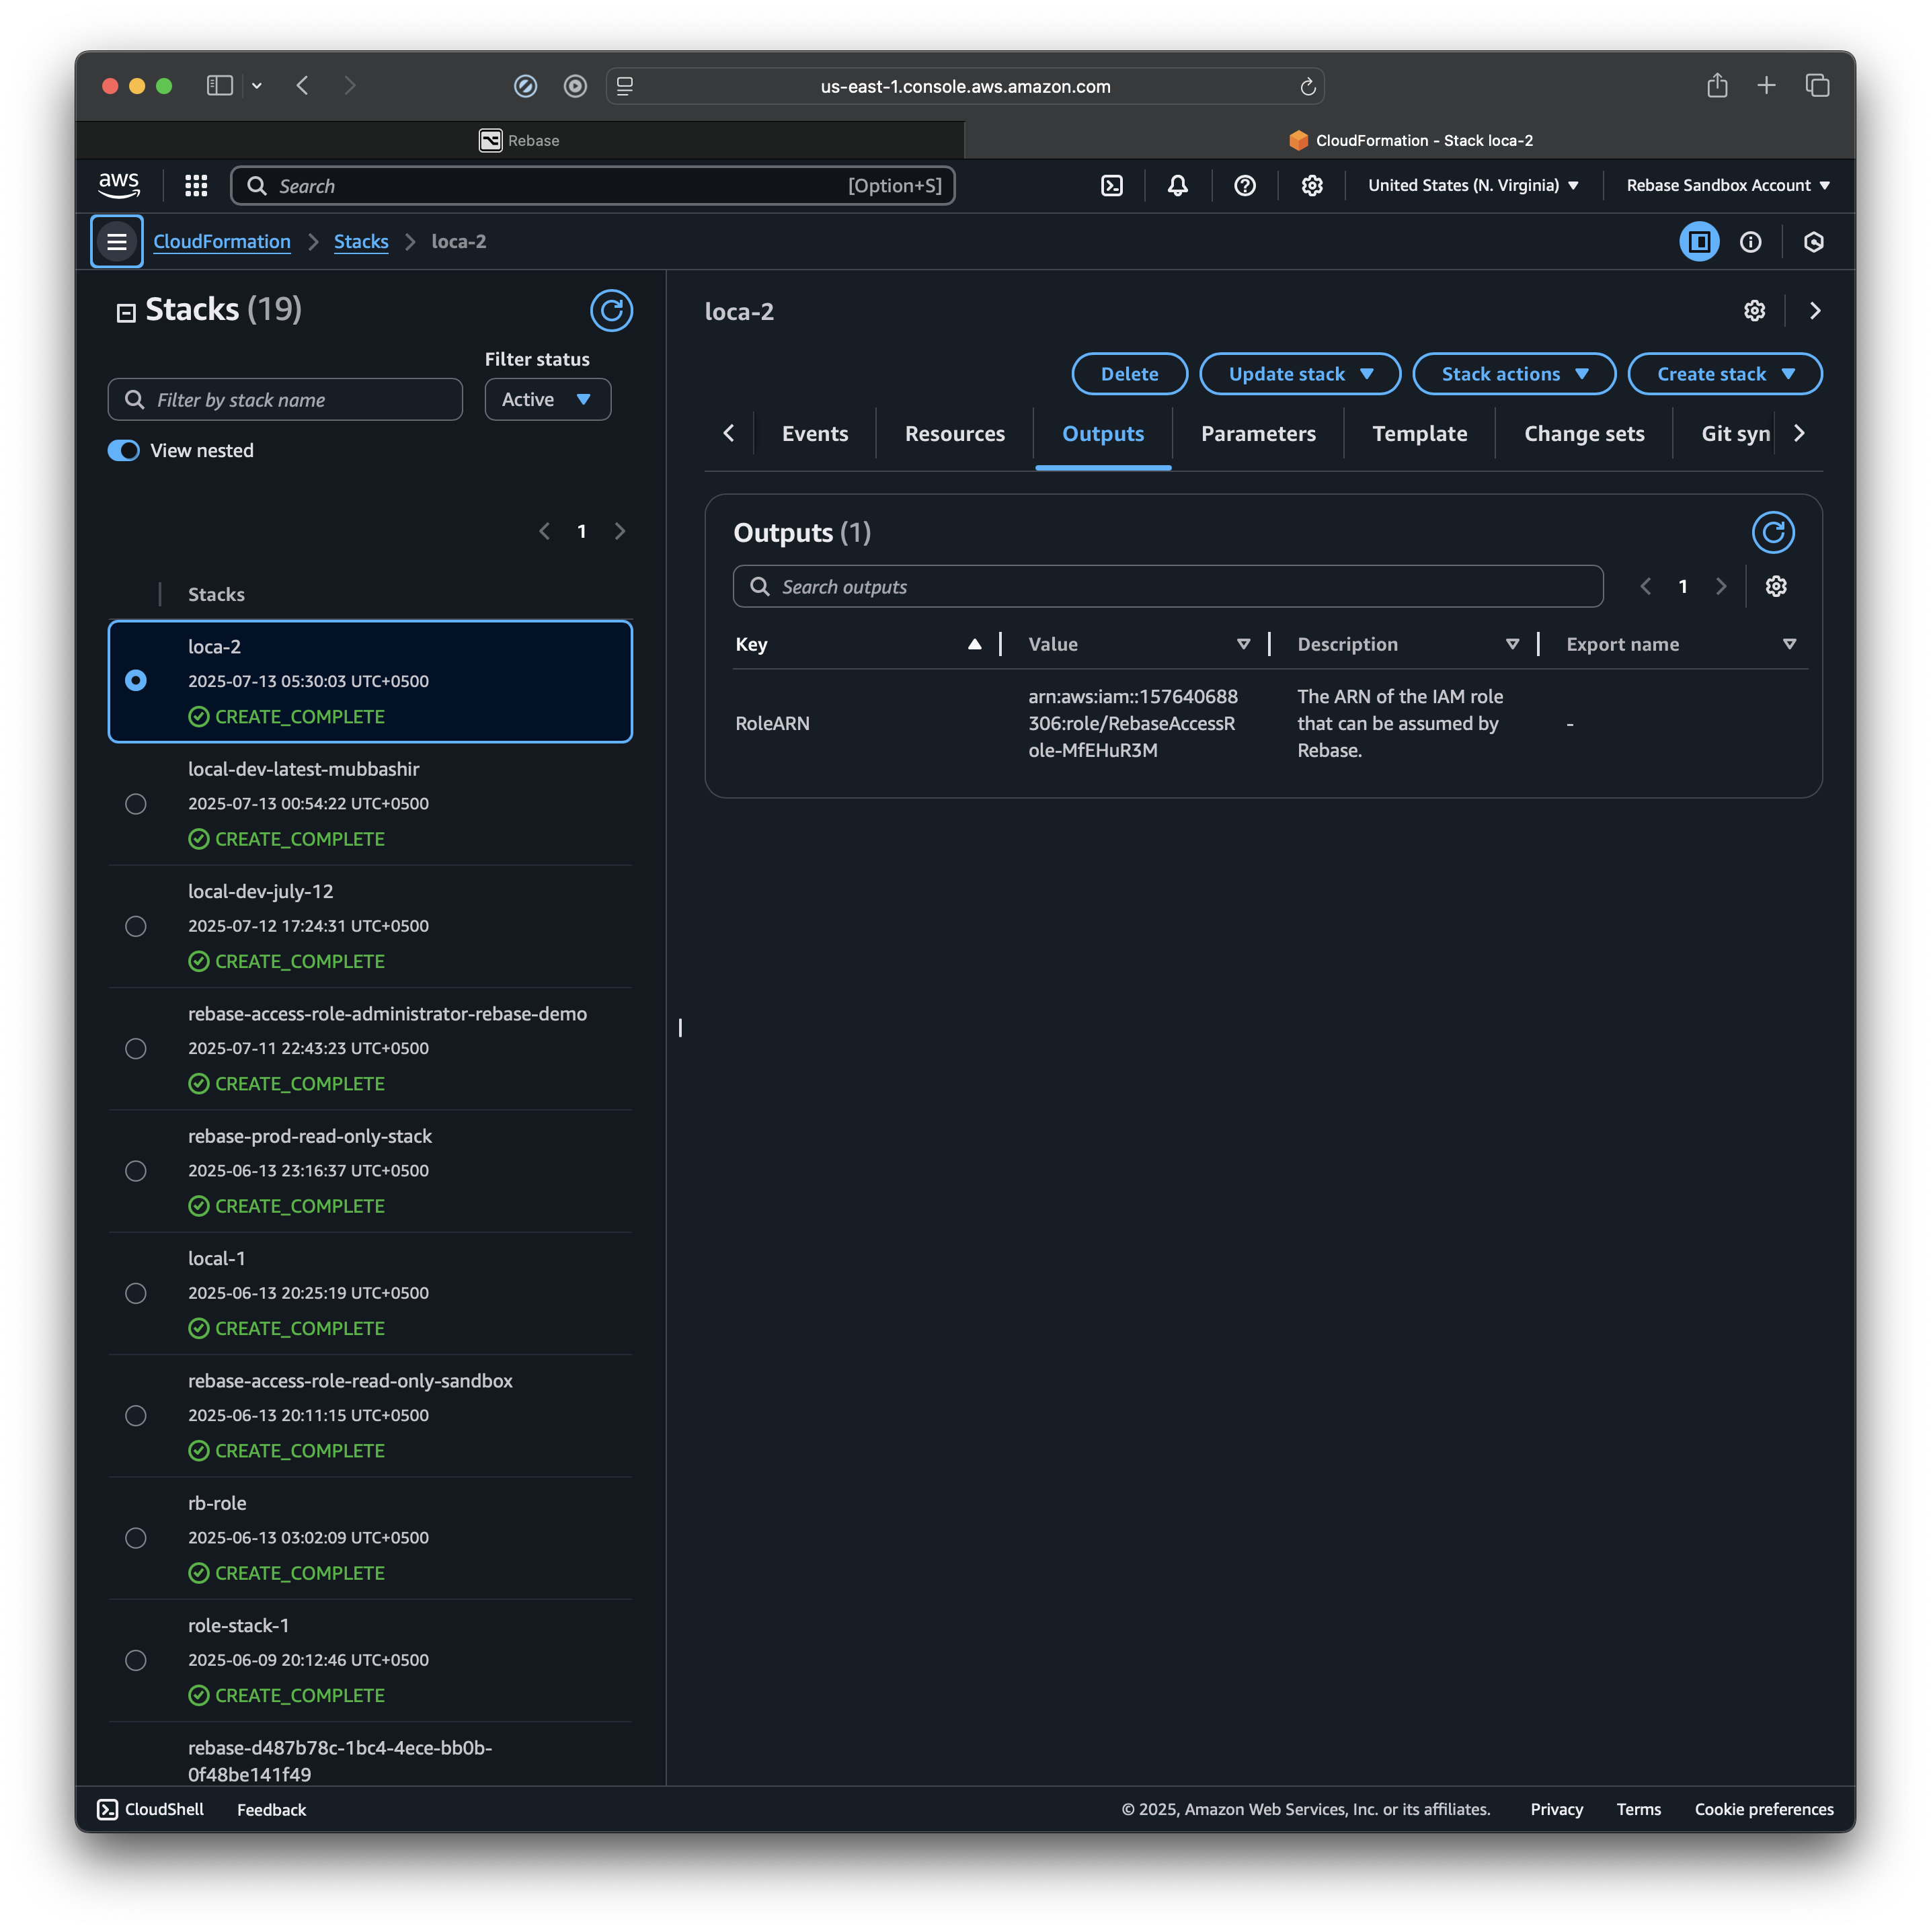
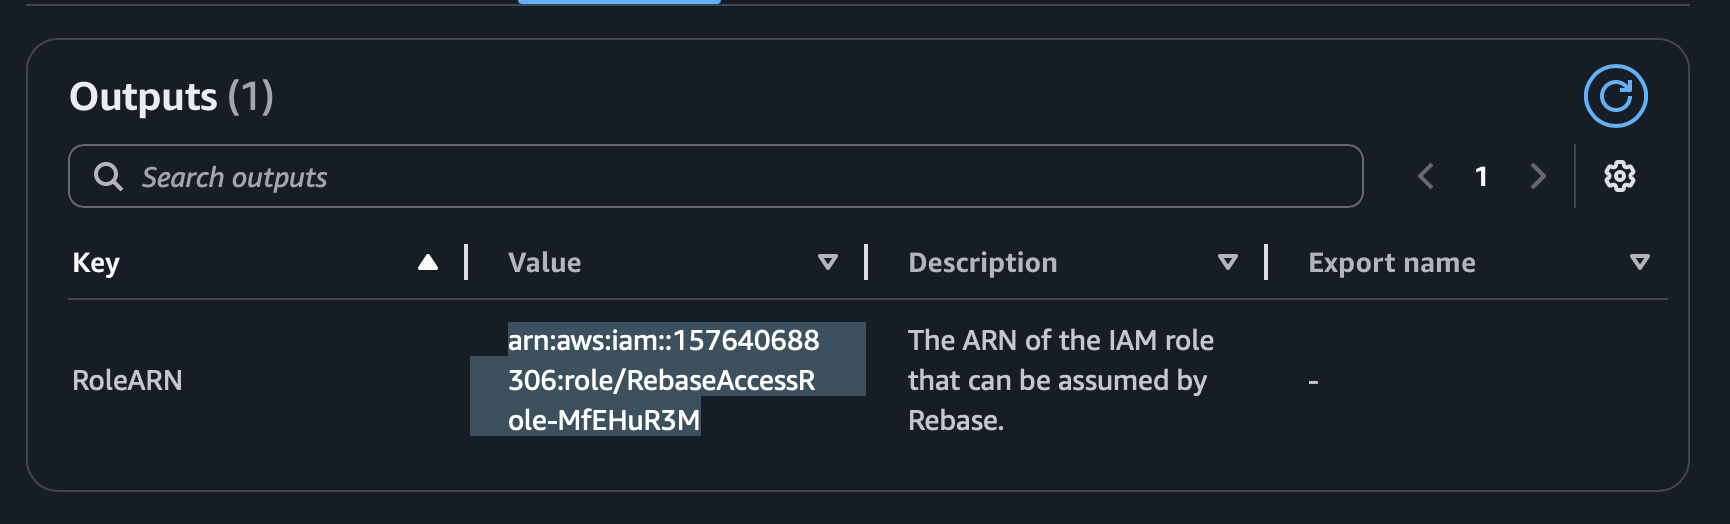
Step 3: Get the Role ARN
Once the stack deployment is complete:- Go to the Outputs tab in CloudFormation
- Copy the Role ARN value
- It will look like:
arn:aws:iam::123456789012:role/RebaseRole
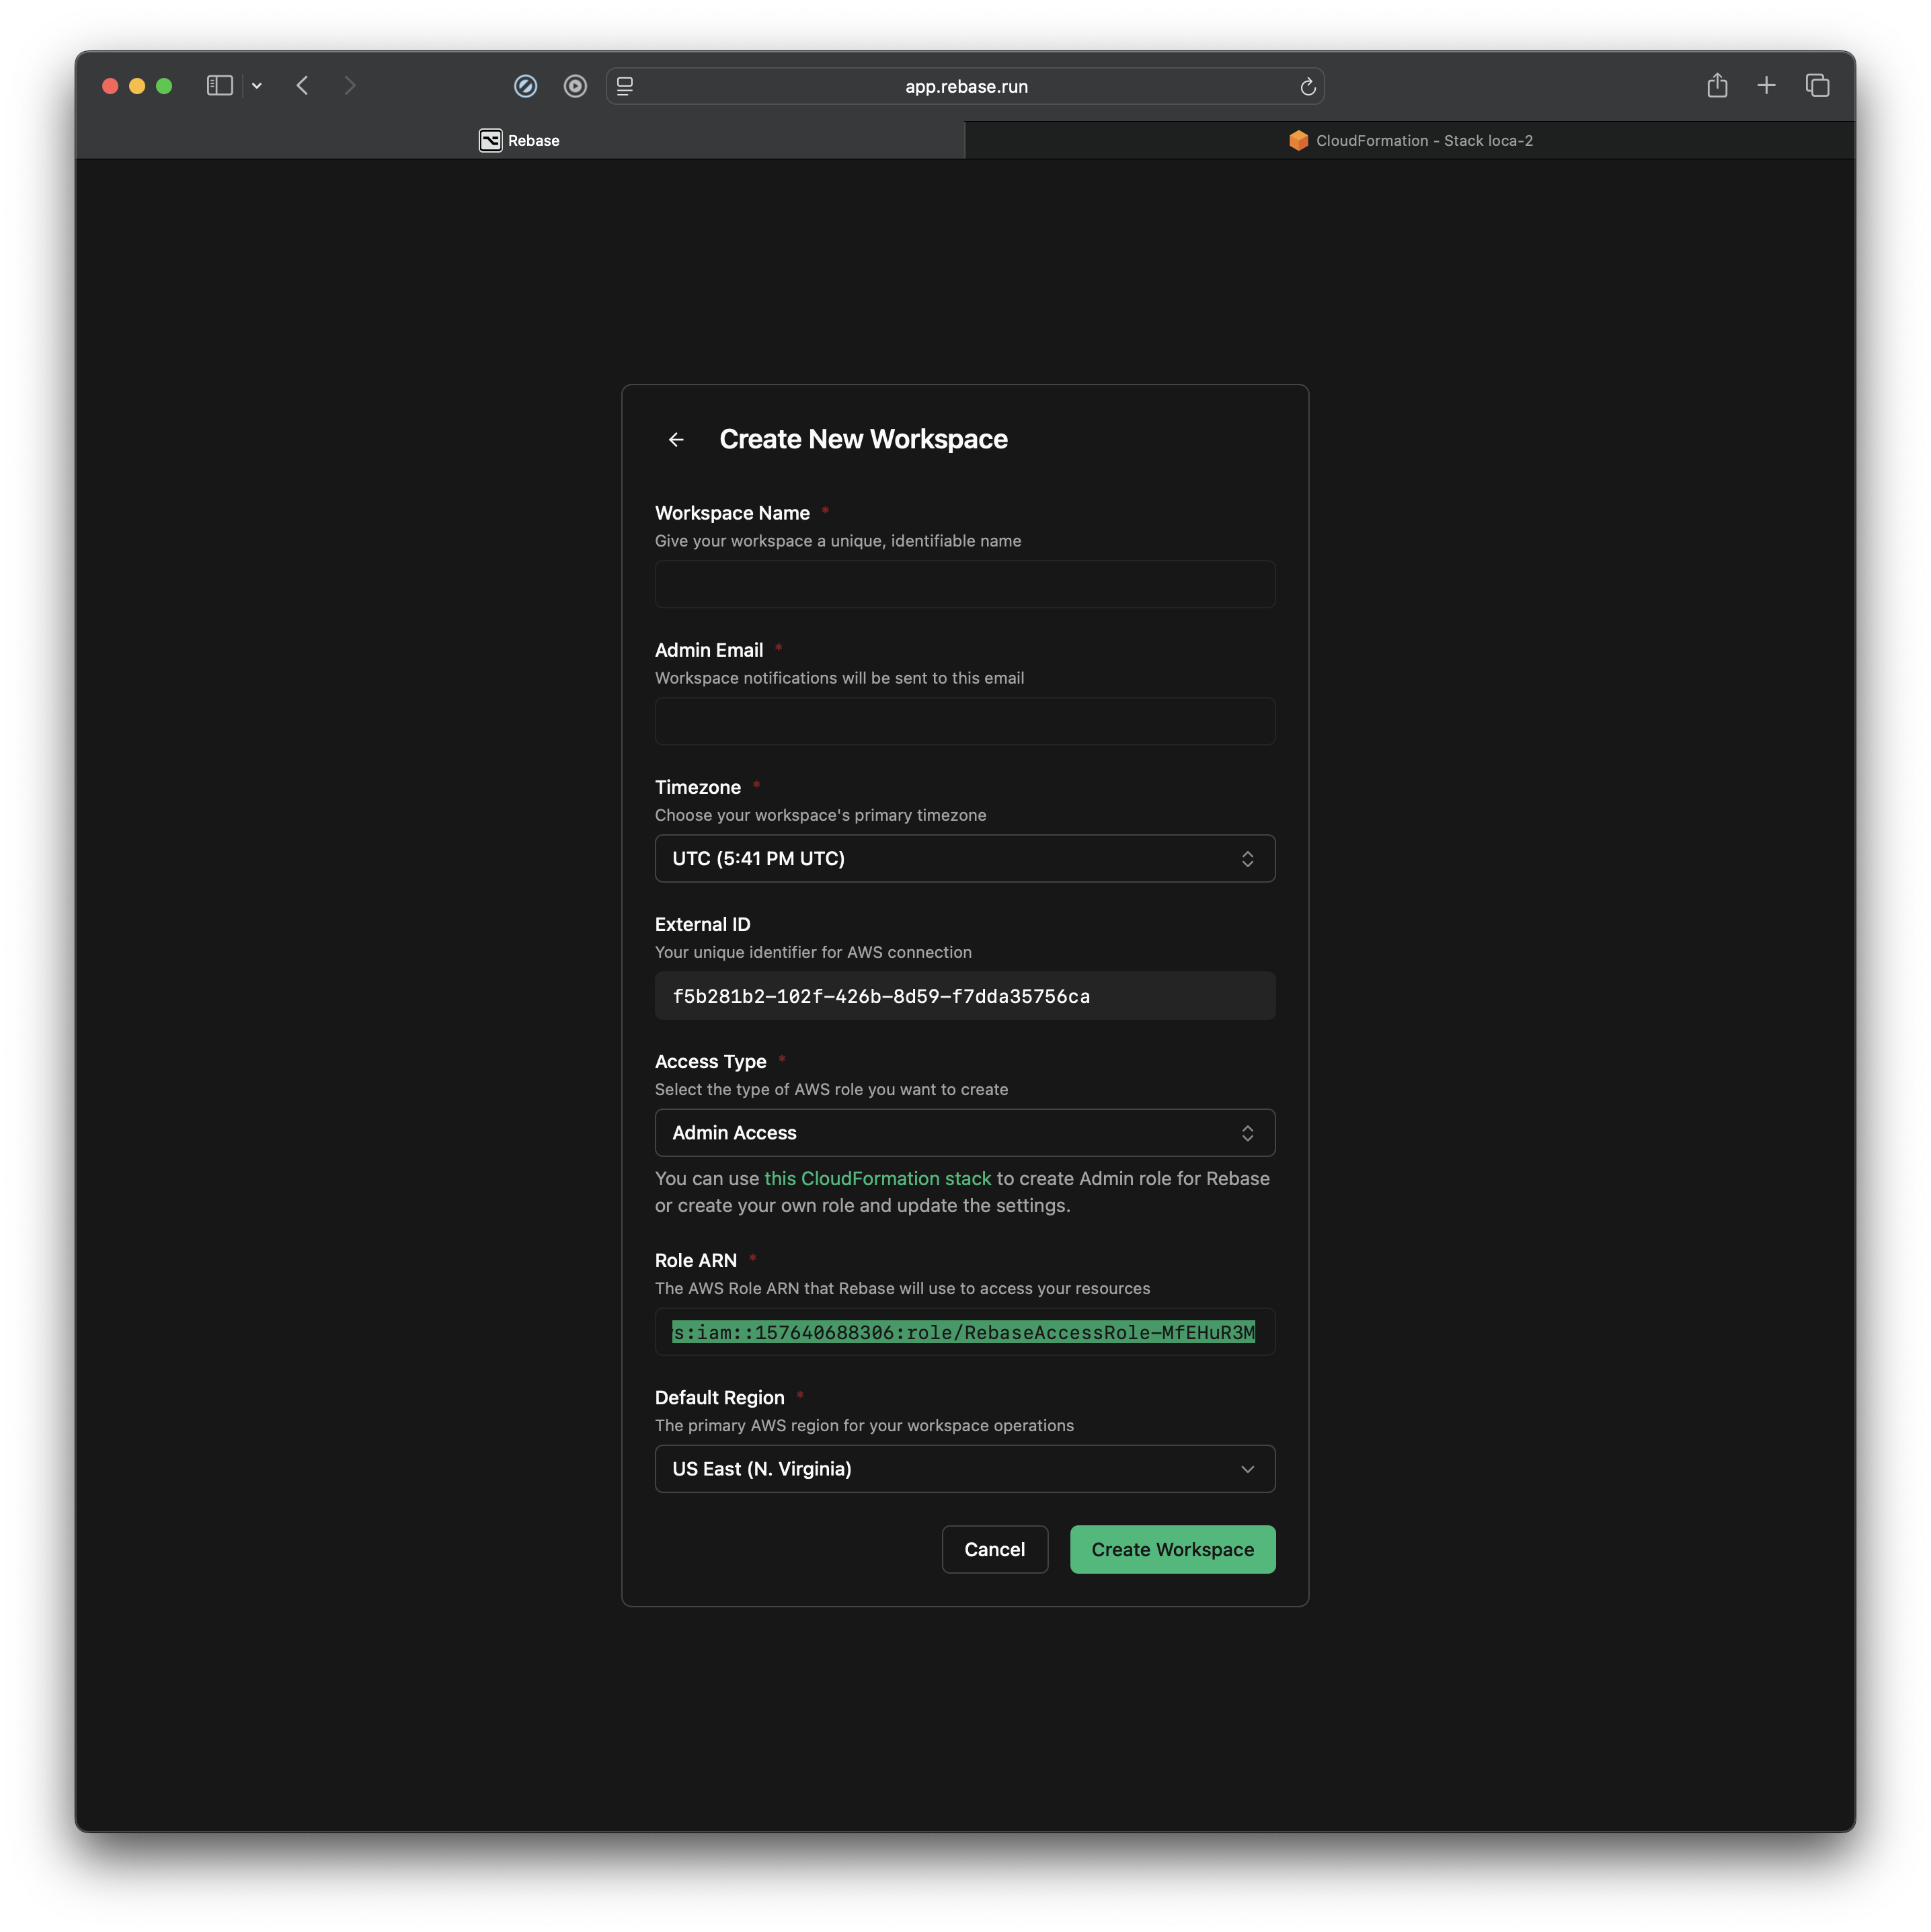
Step 4: Complete Workspace Setup
Return to your Rebase window and fill in the workspace details:- Workspace Name - Give your workspace a descriptive name
- Admin Email - Your notification email address
- Timezone - Select your primary timezone
- External ID - Auto-generated unique identifier
- Role ARN - Paste the ARN from Step 3
- Default Region - Choose your primary AWS region
What Rebase Can Access
Rebase uses least-privilege access principles. The IAM role grants permissions for:- Read access to view your AWS resources
- Infrastructure management for VPCs, EC2, S3, and other core services
- Cost optimization to help reduce your AWS spend
- Security analysis to identify potential issues
- Your application data or databases
- Billing information or payment methods
- Resources outside the connected AWS account

Troubleshooting
CloudFormation Deployment Failed
If the stack deployment fails:- Check that you have admin permissions in your AWS account
- Ensure you’re in the correct AWS region
- Try deploying in a different region if you encounter quota limits
Role ARN Not Working
If Rebase can’t assume the role:- Verify you copied the complete ARN from CloudFormation outputs
- Check that the CloudFormation stack deployed successfully
- Wait a few minutes for AWS IAM propagation
Connection Timeout
If the workspace creation times out:- Refresh the page and try again
- Check your internet connection
- Contact support if the issue persists
Multiple AWS Accounts
You can connect multiple AWS accounts to Rebase by creating separate workspaces:- Each workspace connects to one AWS account
- Switch between workspaces using the workspace selector
- Maintain separate configurations and permissions per account
Security Best Practices
- Regular audits - Review connected accounts periodically
- Least privilege - Rebase only requests minimum required permissions
- Monitoring - Use AWS CloudTrail to monitor Rebase API calls
- Rotation - Regenerate external IDs if needed for enhanced security
Next Steps
Once connected, you can:- Explore built-in prompts for common AWS tasks
- Ask questions about your infrastructure in natural language
- Set up cost monitoring and optimization
- Deploy new resources through conversations
Need Help?
If you run into any issues during the connection process:- Contact support at support@rebase.run